Exclusion Zones
Using Forced Perspectives within a Shot
Forced Perspectives work well at the beginning of a new shot. A new shot is a like a new beginning and you can choose the framing of your incoming shot in Liquid Cinema so that the viewer will always see your chosen framing no matter what direction they were looking in the previous shot.
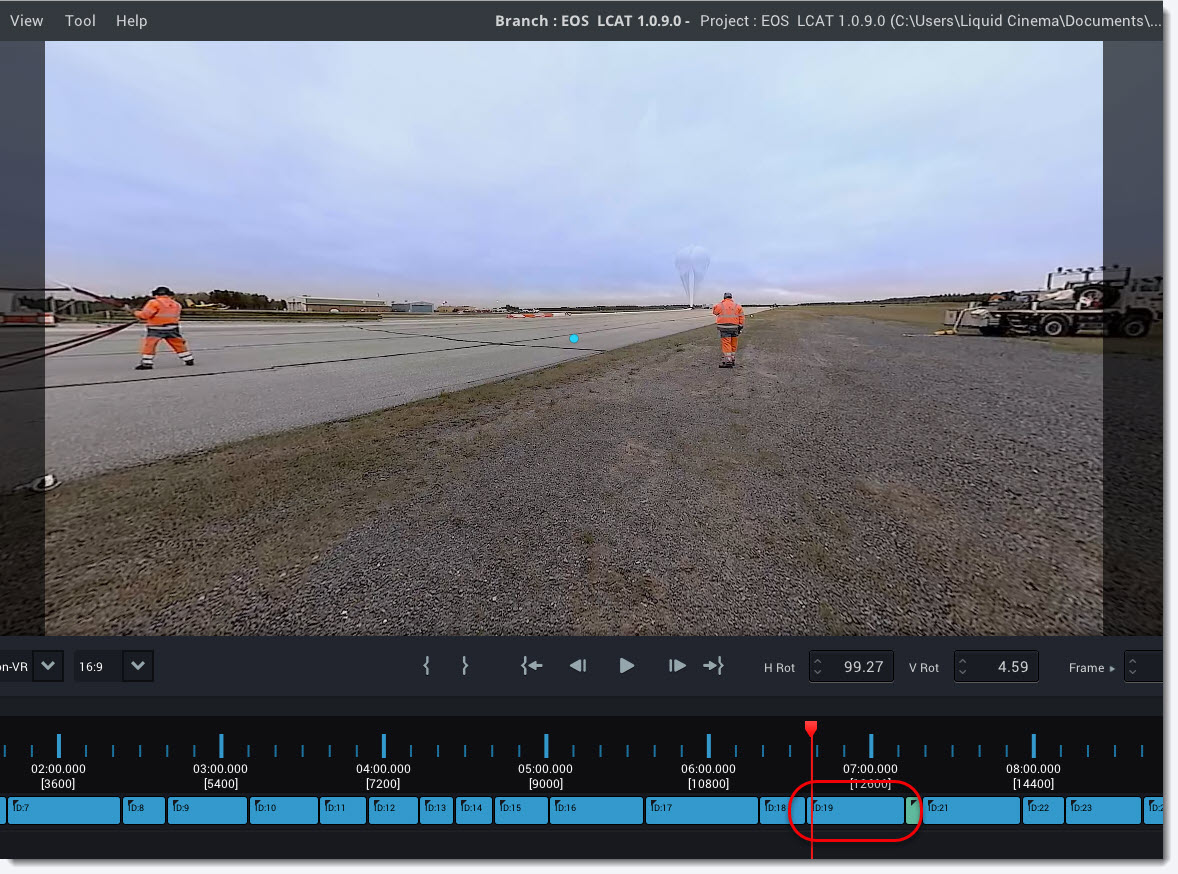
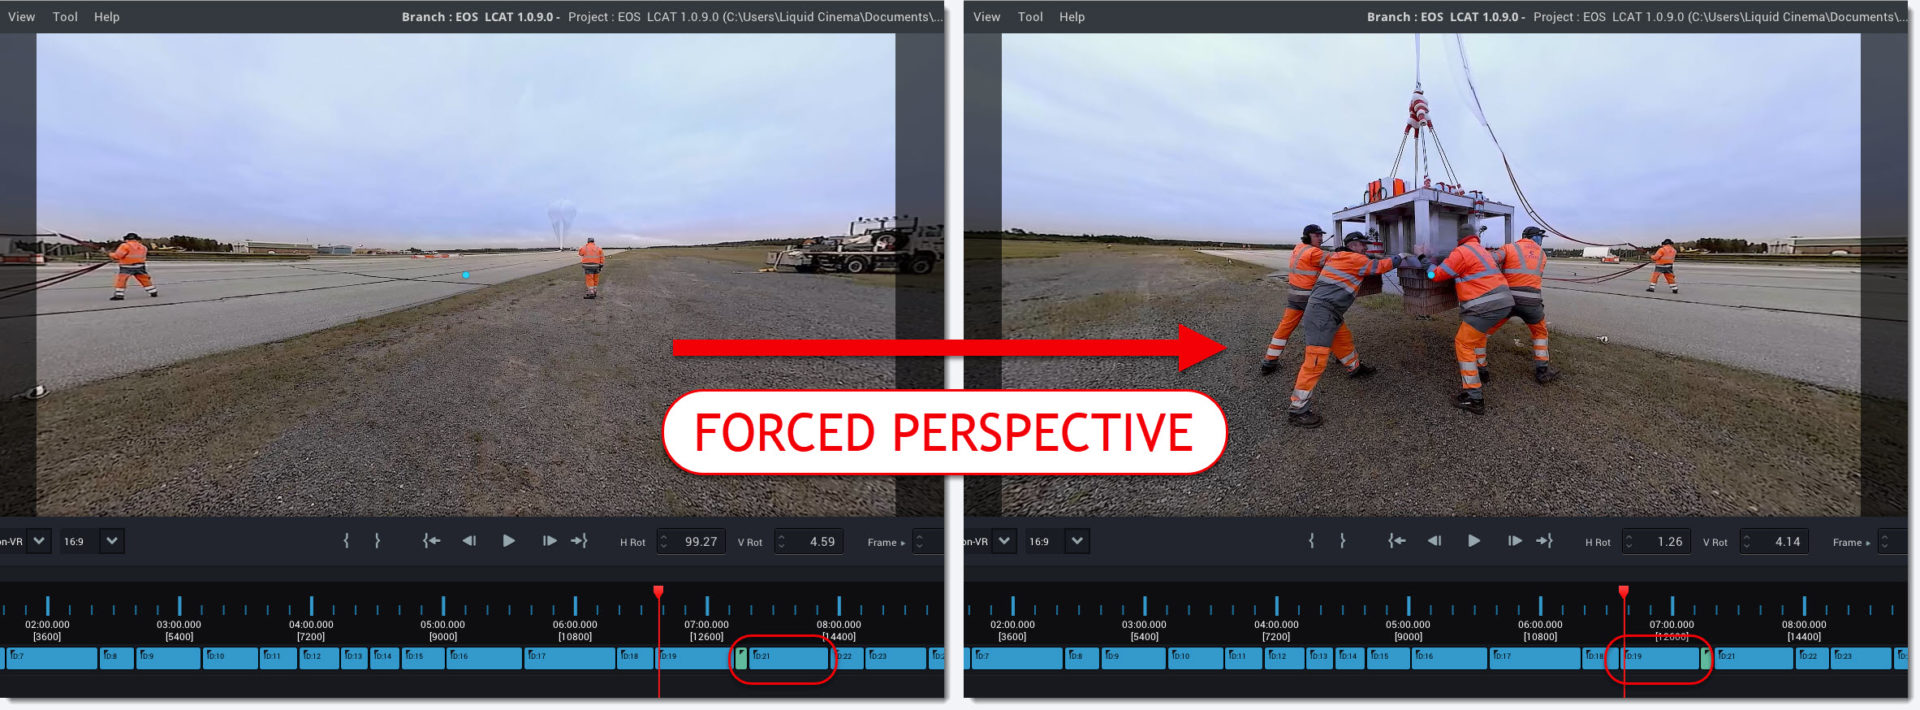
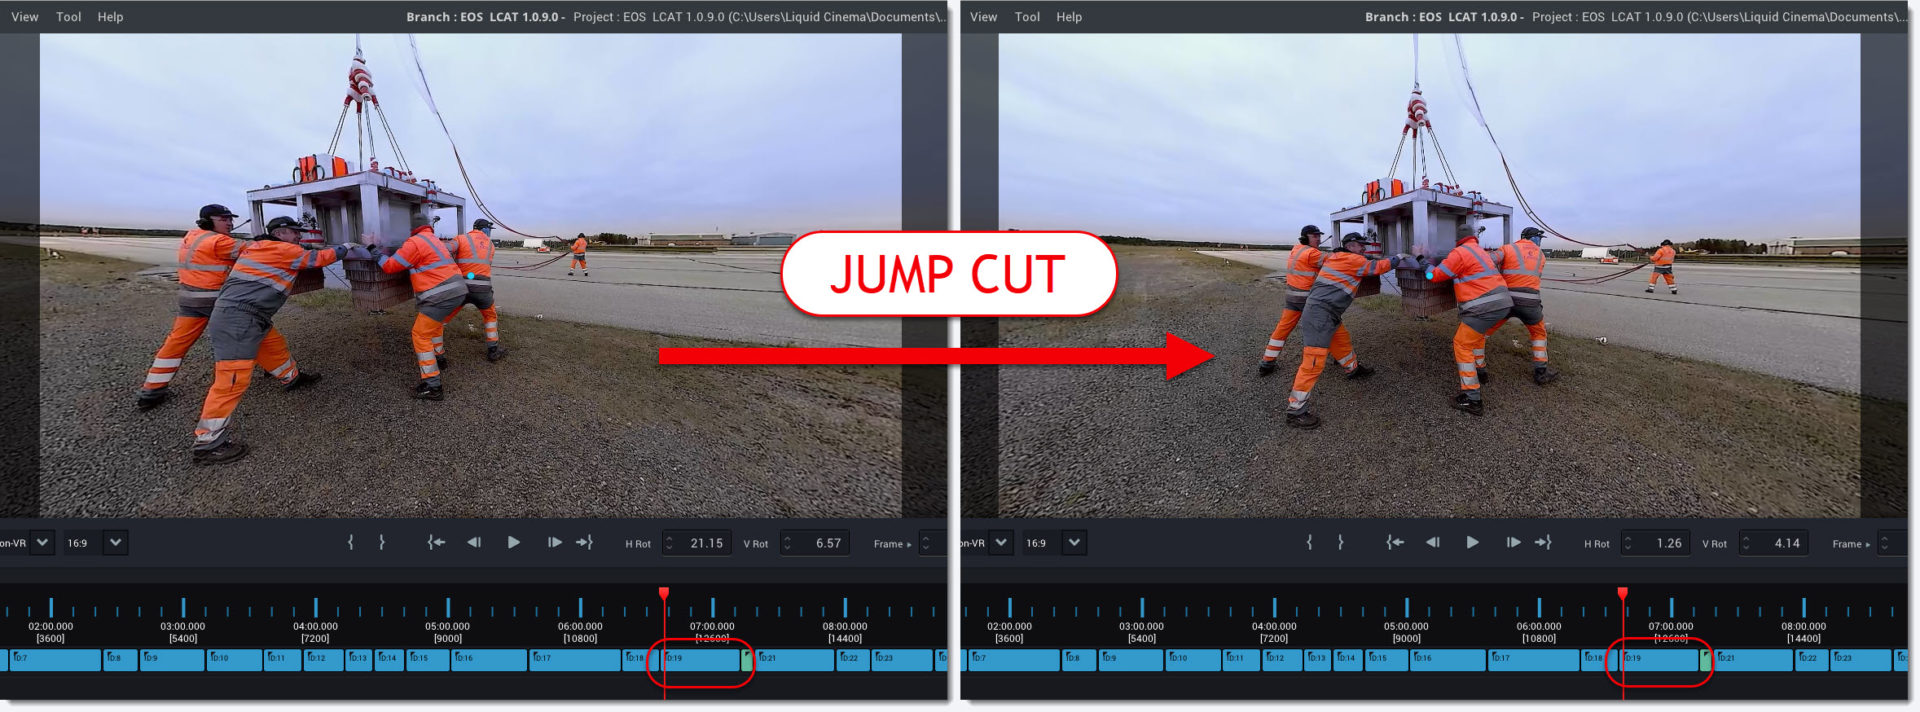
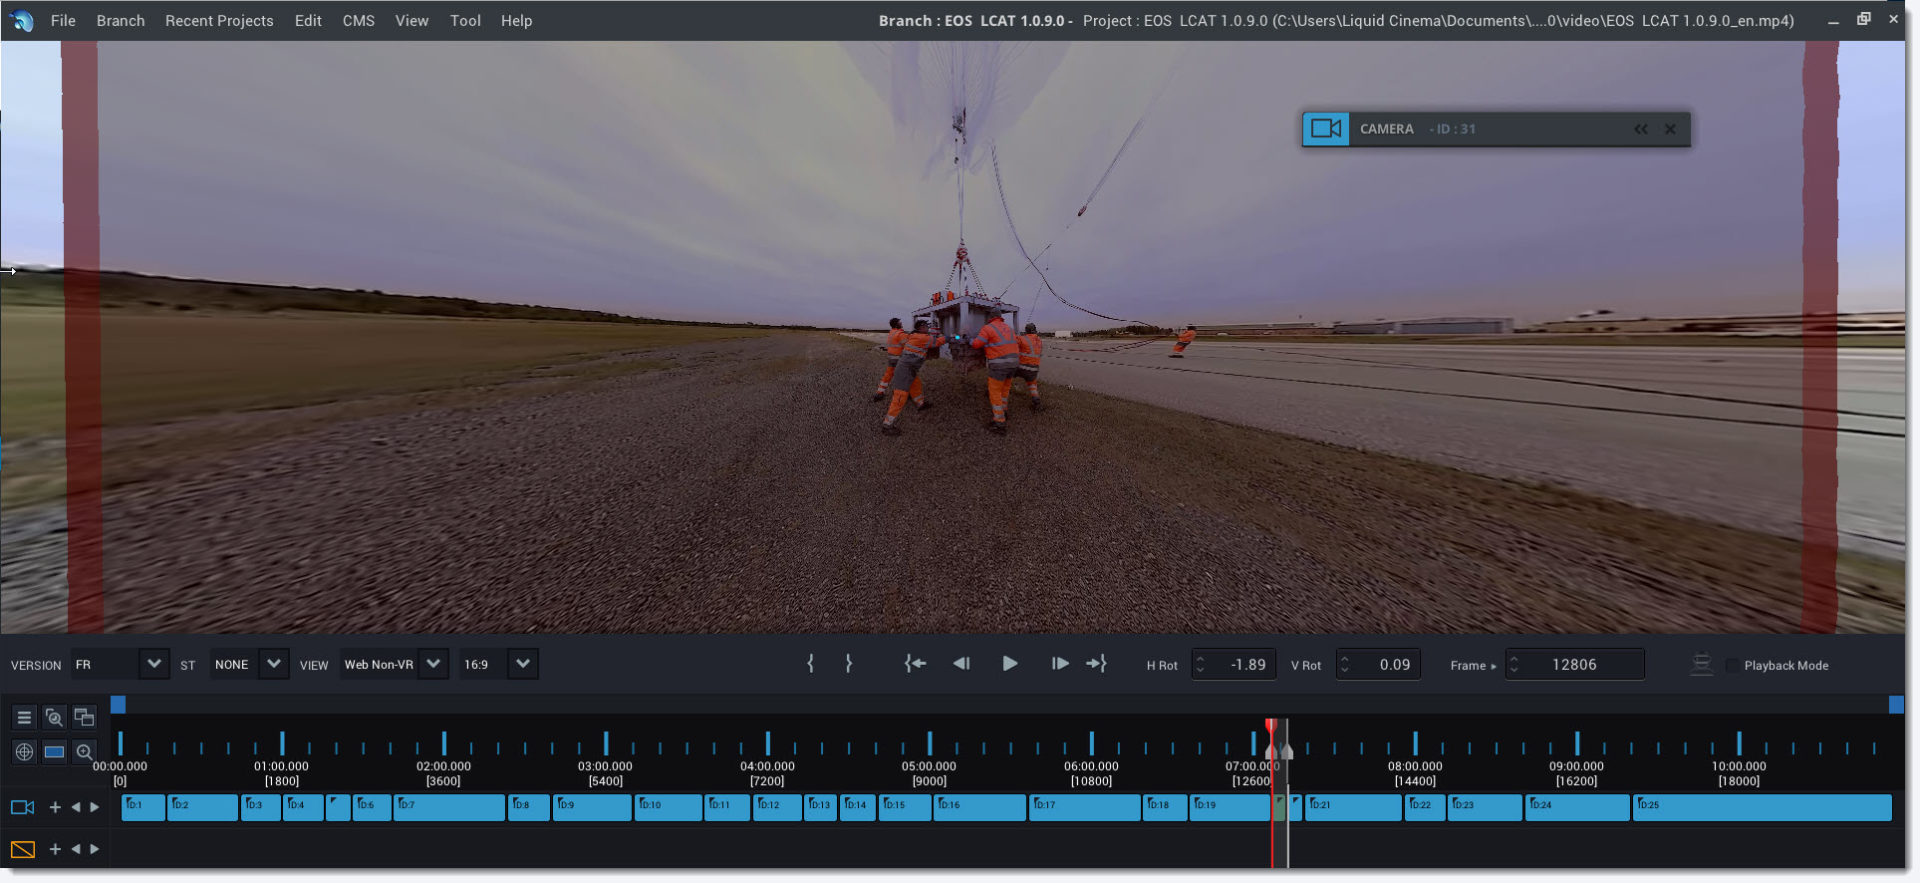
But what if you want to use a Forced Perspective in a middle of a scene? Let’s take the following 360 shot for example. Here are two angles within the same 360 frame.
Angle 1: This perspective of a 360 frame shows a single man watching a balloon to launch in the distance.
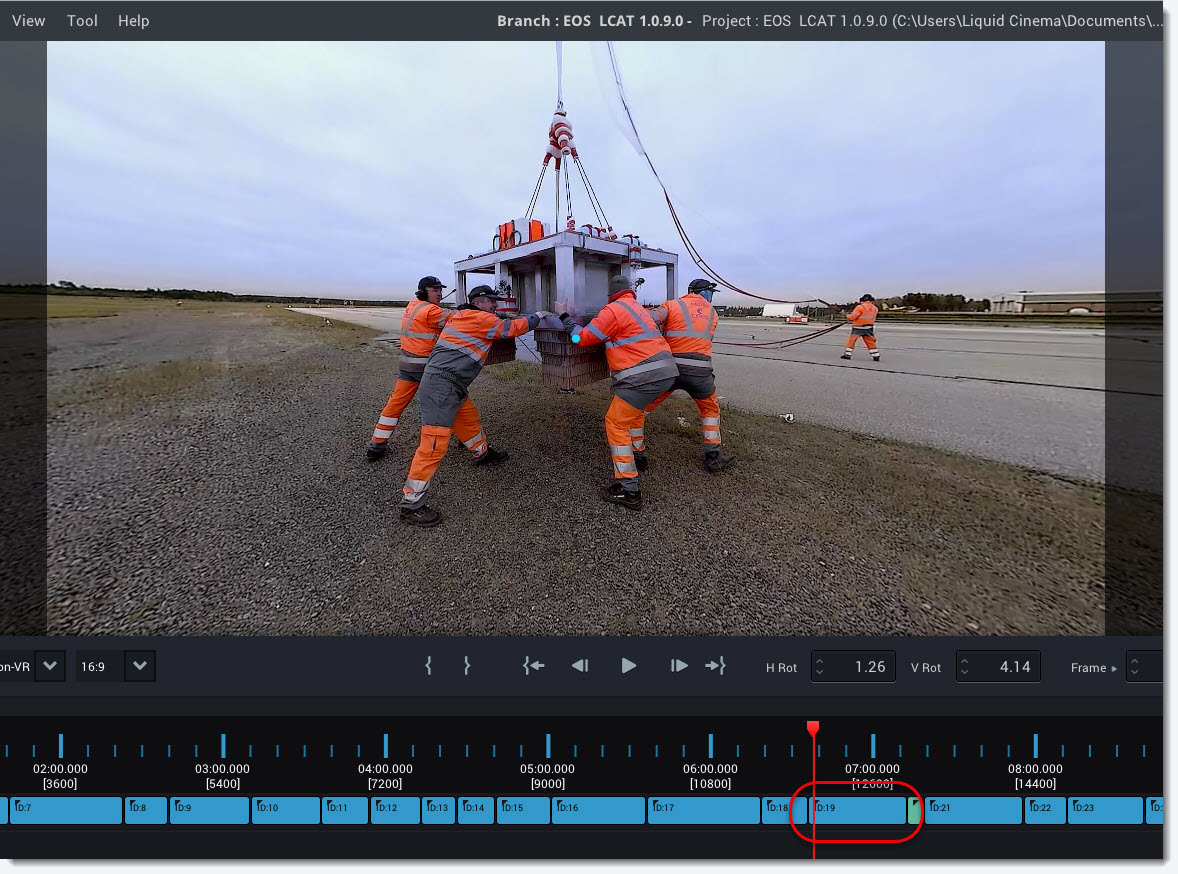
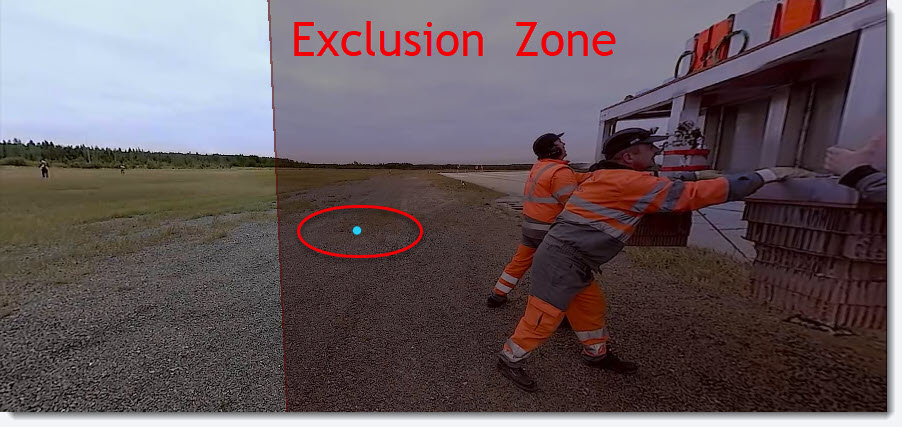
Angle 2: Within the same 360 frame to the left of the single man is a group of men holding the payload that the balloon is going to lift into the sky. However, the viewer could miss the pivotal moment when the men release the payload later in the scene if the viewer never ends up turning and looking to the left.
We could set a standard Forced Perspective in the middle of the scene and this would lead to a good cut revealing the men launching the platform if the viewer is still looking a the single man watching the balloon launch at the time the Forced Perspective is executed.
The viewer would perceive this as a new shot in the sequence and never even know they were seeing a different angle of the same 360 shot. In this way, we would succeed in using a cut brought about the Force Perspective to redirect the viewer to a crucial action or moment in the shot.
However, we don’t know if the viewer is looking in the direction of the single man watching the balloon launch the at the time the Forced Perspective is executed.
If the viewer is already looking in the general direction of the men launching the payload this would lead to a highly jarring jumpcut when the Forced Perspective reframes the shot.
The solution to this problem is utilizing Liquid Cinema’s Exclusion Zones.
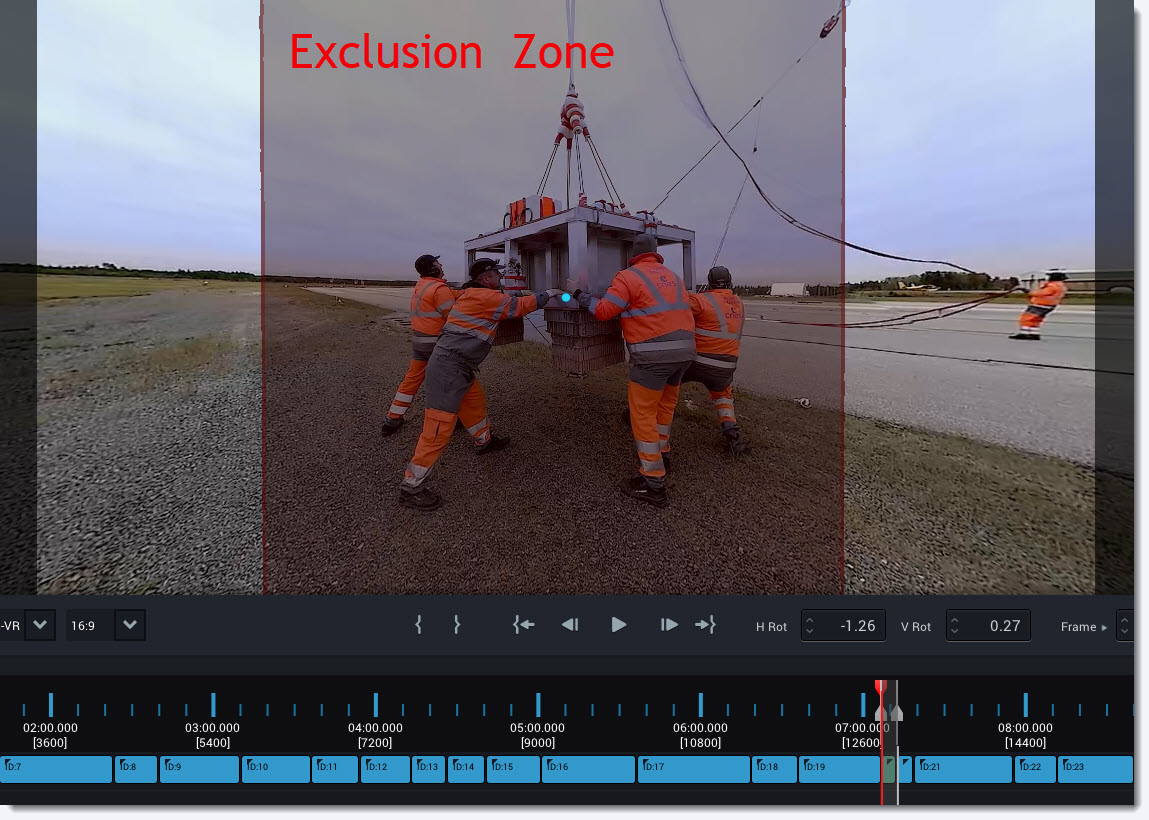
What are Exclusion Zones?
An Exclusion Zone is a designated area within the 360 video sphere. When the viewer’s gaze falls anywhere within the Exclusion Zone the Forced Perspective is NOT executed. When applying an Exclusion Zone to a Forced Perspective we call it a Conditional Forced Perspective.
Creating Conditional Forced Perspectives using Exclusion Zones
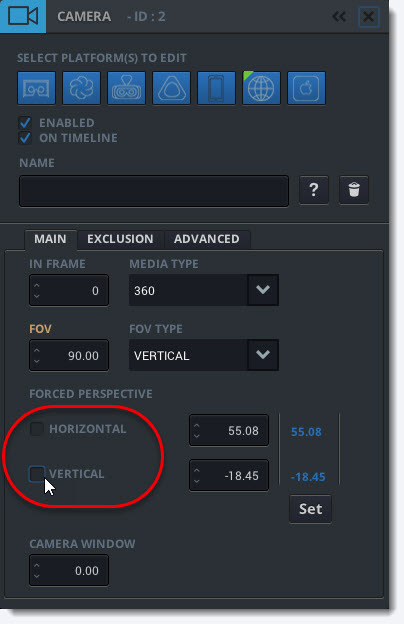
Exclusions Zones are authored in the Camera Event Panel.
Create a Forced Perspective at the frame where you want to have a Conditional Forced Perspective and click the Exclusion Tab.
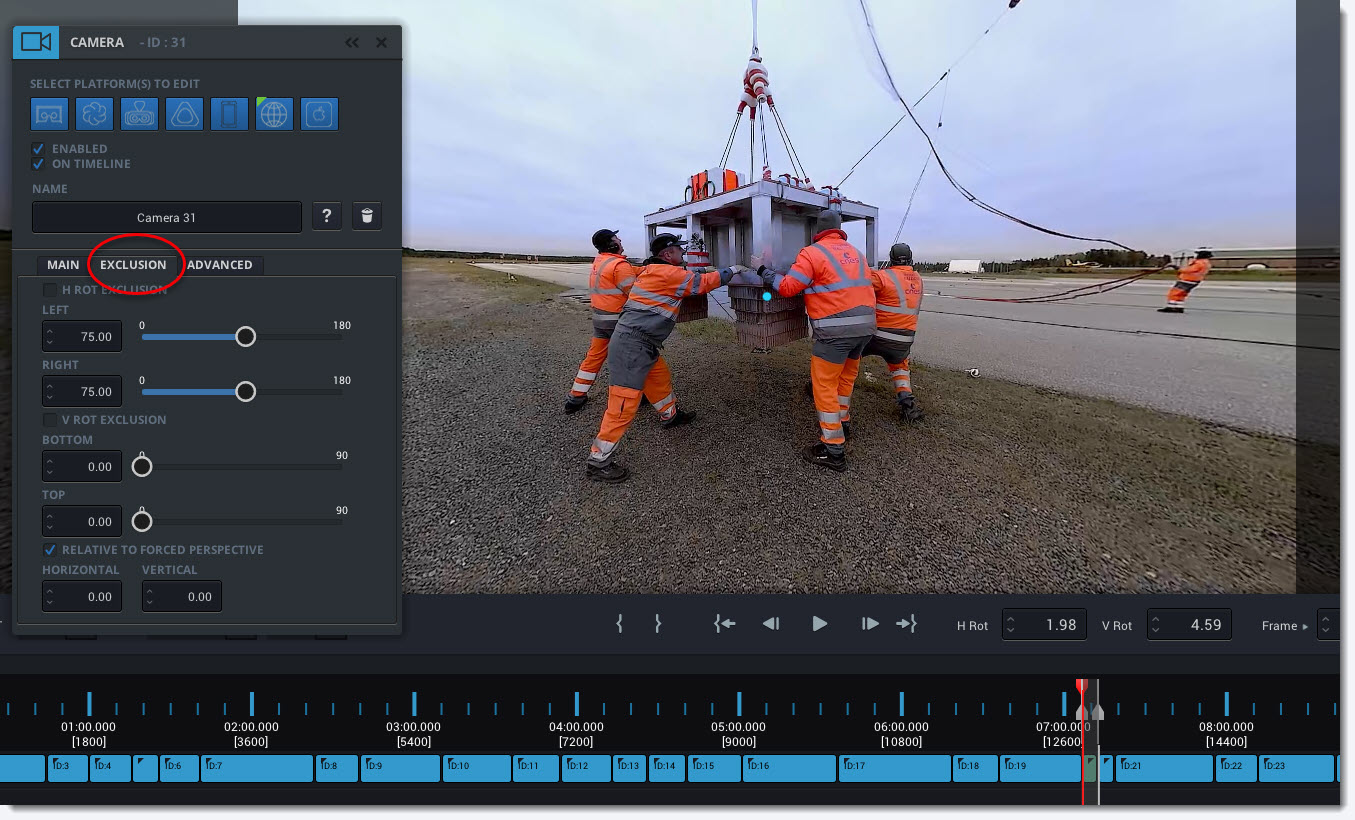
Click the Horizontal Exclusion Checkmark to enabled the horizontal exclusion range. By default, it is set to 75 degrees right and left relative to the Forced Perspective.
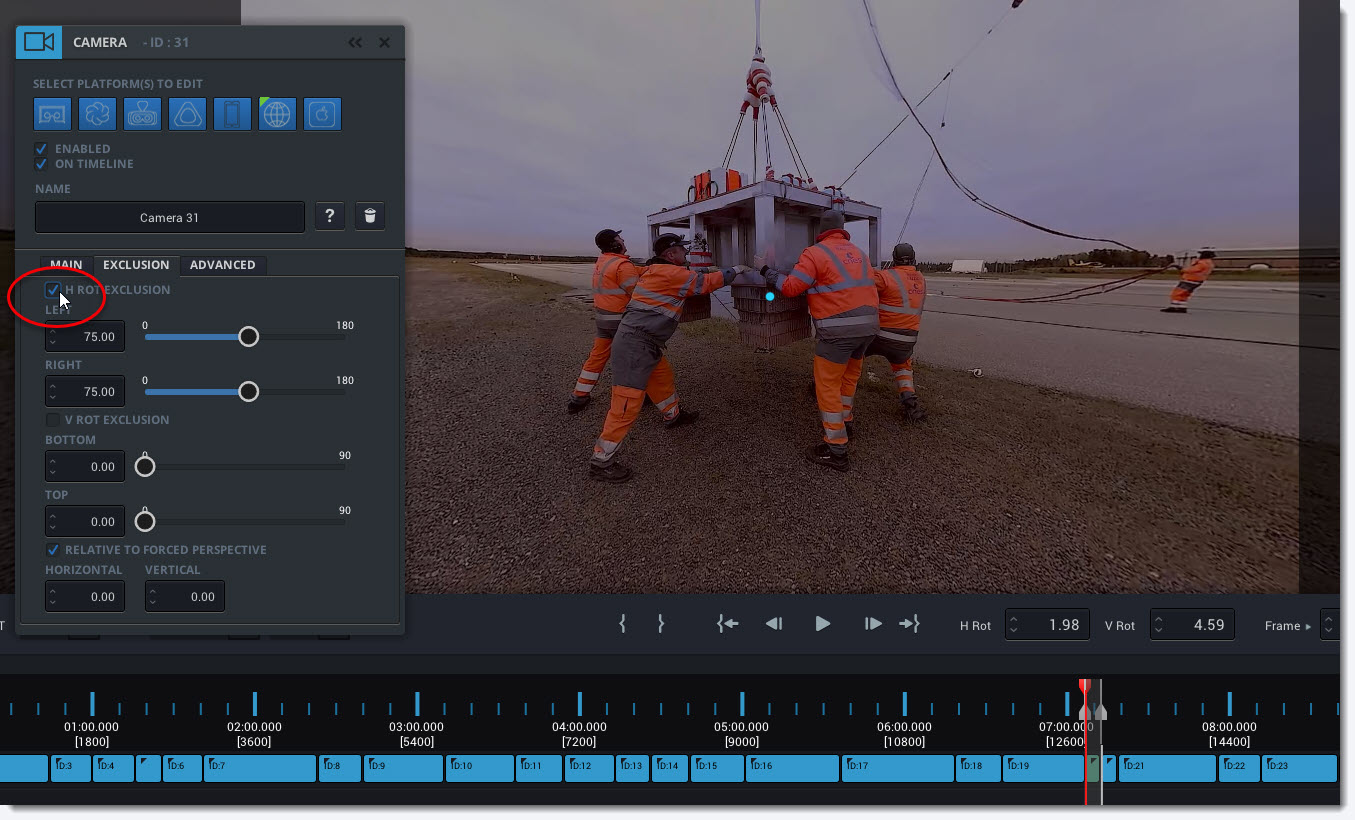
Move the sphere to reveal the left border of the Exclusion Zone.
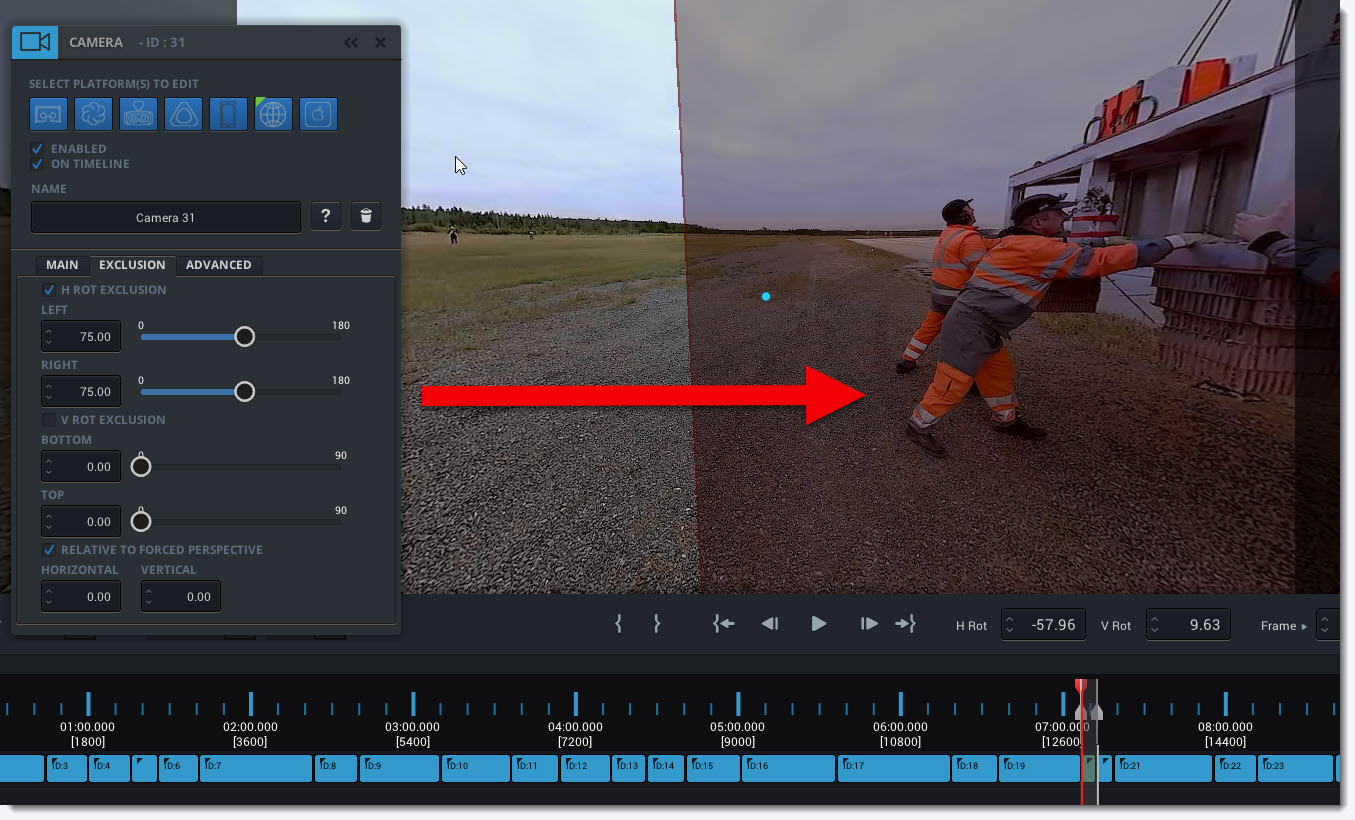
Use the LEFT Slider to move the left border of the Exclusion Zone to the last point that you think will make a clean cut. Move the sphere and use the Frame Guide and reticle to check the framing that the viewer is able to see when approaching the Exclusion Zone.
When the reticle falls into the Exclusion Zone the Forced Perspective will NOT be executed. Move the sphere to move the reticle across the Exclusion Zone border to see the framing around the Exclusion Zone border. Ideally, any angle outside the Exclusion Zone should lead to a good cut when the Forced Perspective is executed.
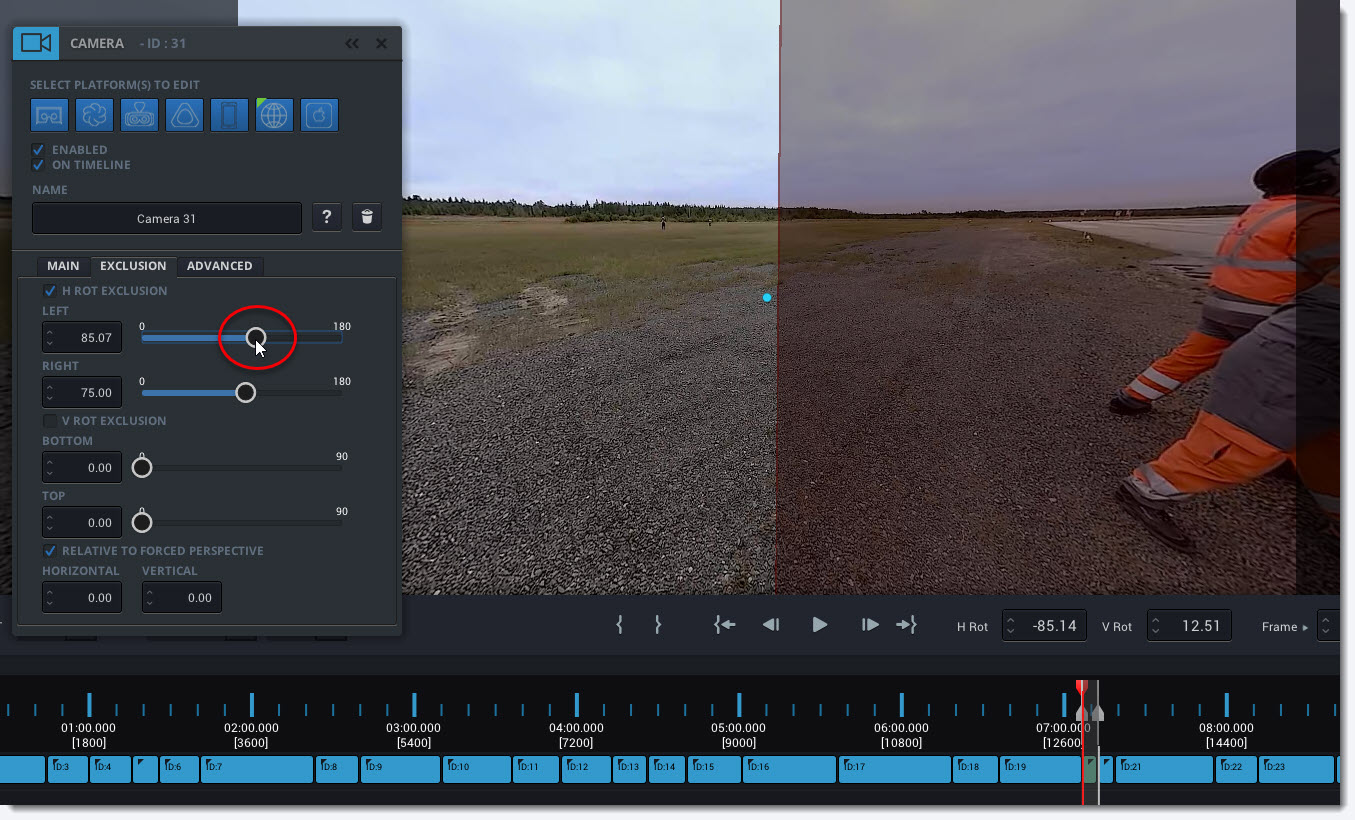
Now move the sphere to expose the right border of the Exclusion Zone and repeat the process set the right border using the RIGHT Slider.
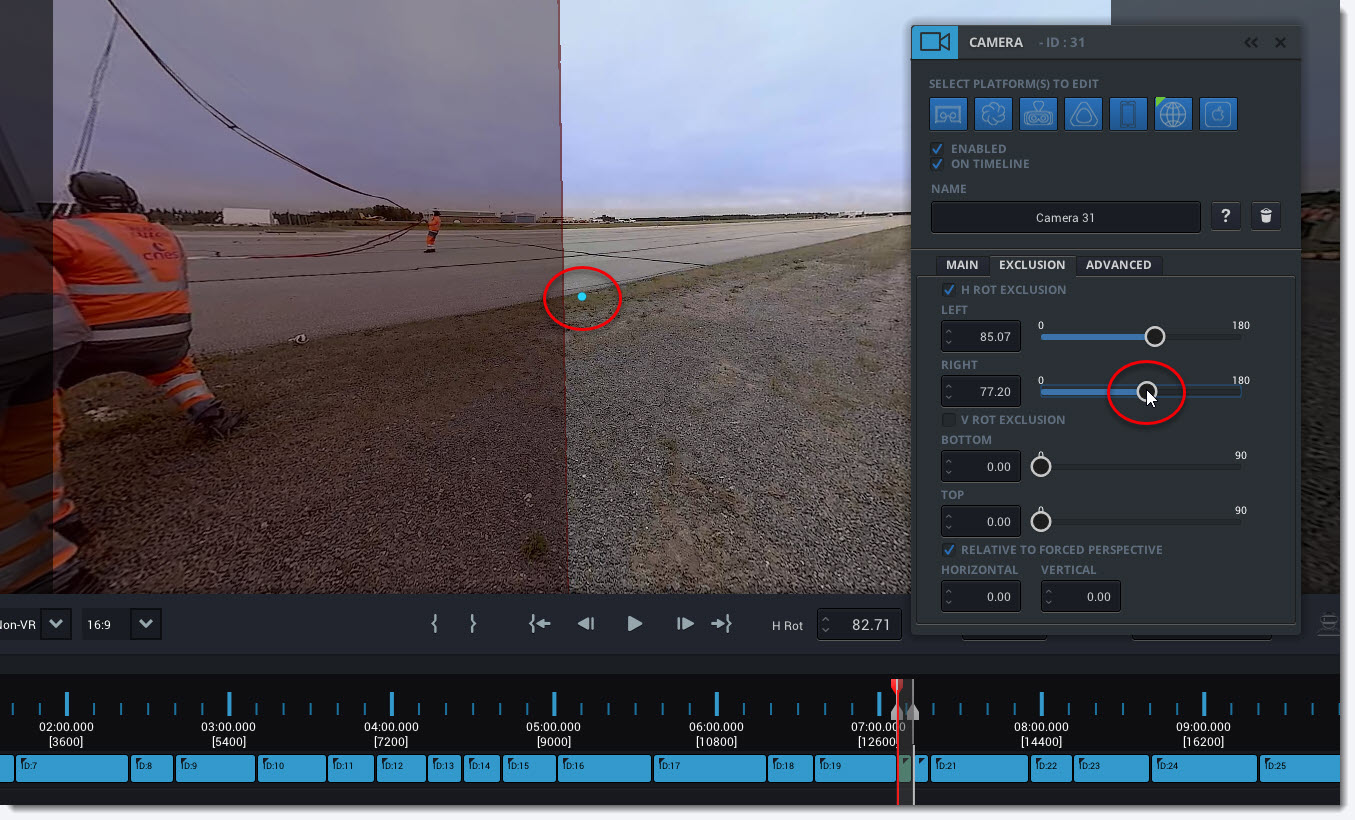
You have now set your Exclusion Zone. Zoom out the viewer (- minus) and toggle the Frame Guides off (; semicolon) to see the Exclusion Zone better.
Vertical Exclusion Zone Border
Most of the time adjusting the Horiztonal borders of your Exclusion Zones relative to your Forced Perspective will be all you need to do. There may be cases where you might need to adjust the vertical borders of your Exclusion Zone. For instance when creating a Forced Perspective where you want the viewer to see a detail at the top of the sphere.
Click the Vertical Exclusion Checkmark to enabled the vertical exclusion range. Use the BOTTOM Slider and TOP Slider to adjust the bottom and top borders of your Exclusion Zone.
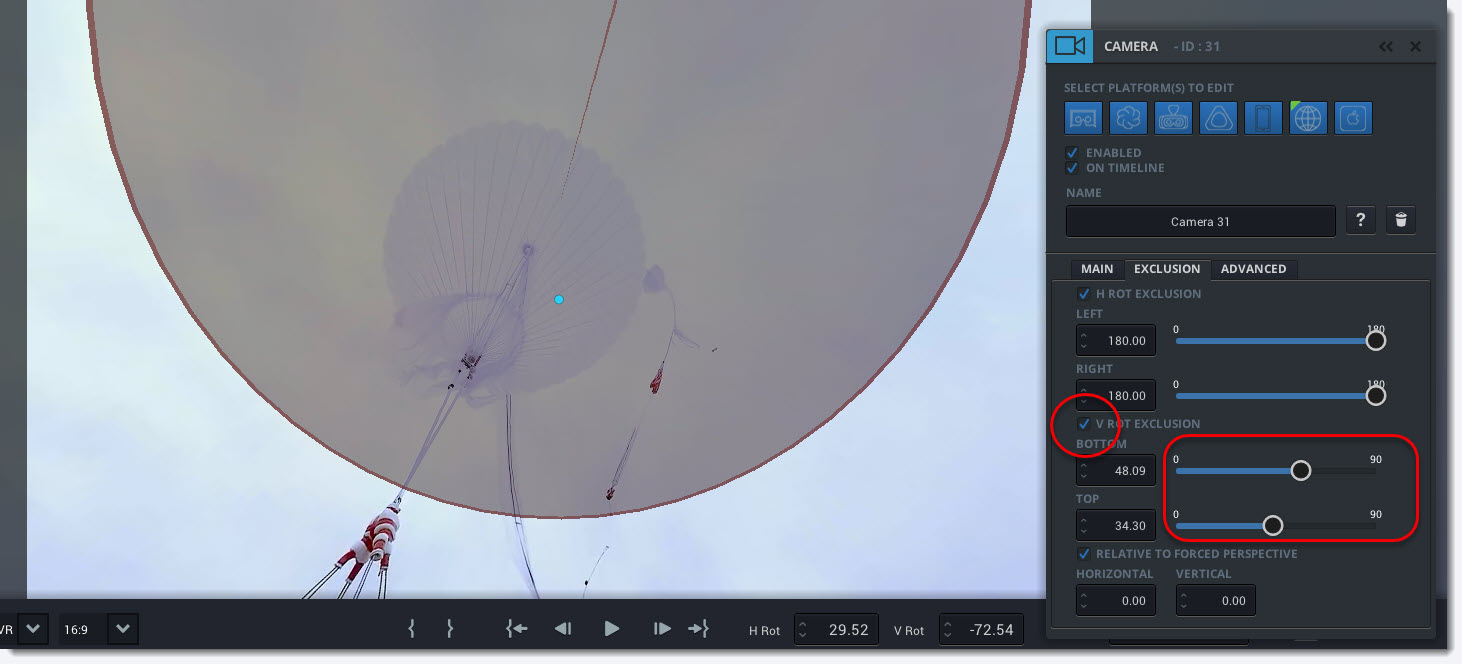
Setting the Vertical Exclusion Zone Border will not have any effect in VR as Liquid Cinema suppresses the vertical forced perspective in VR to avoid a horizon shift. However when using spherical video for the flat screen Conditional Forced Perspective can be a powerful tool for directing user attention within a scene.
Positioning Exclusion Zones
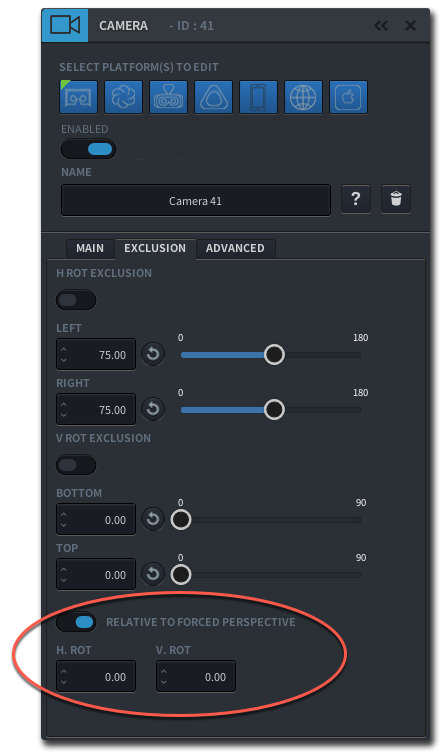
Exclusion Zones are positioned relative to the Forced Perspective by default but they can be freely positioned as well.
Switch off the Relative to Forced Perspective toggle and position your Exclusion Zones relative to zero degrees HRot and zero degrees VRot.
FAQ – Forced Perspective
-
How does Forced Perspective work in VR?
Forced Perspective works very well in VR. However, in VR Liquid Cinema suppresses the vertical forced perspective, as this would shift the horizon and be disconcerting for the viewer.
This behaviour is reflected in the Camera Panel where the vertical forced perspective check box is grayed for the VR platforms.
-
Do I have to use Forced Perspective?
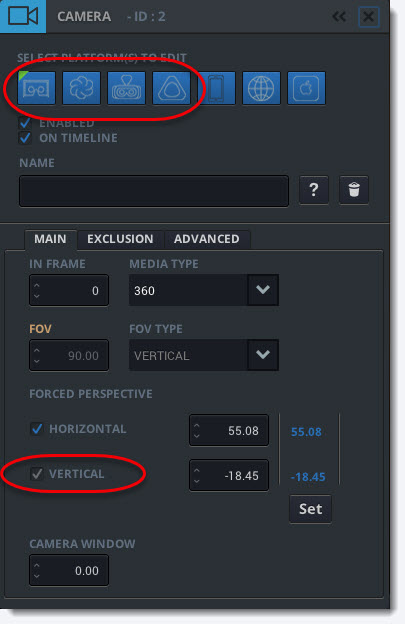
Using Forced Perspective is entirely optional and up to the filmmaker. Forced Perspective is applied to a specific frame using the Camera Event Editor. If no Forced Perspective is authored on a cut no forced perspective is applied.
To disable a Forced Perspective on a camera event simply uncheck the HORIZONTAL and VERTICAL Forced Perspective checkboxes. The Forced Perspective will not be executed.