Creating a New Project


1. To Create a new Project choose the FILE->NEW in the Top Navigation


2. The Project Details Panel will appear. Give your project a name.


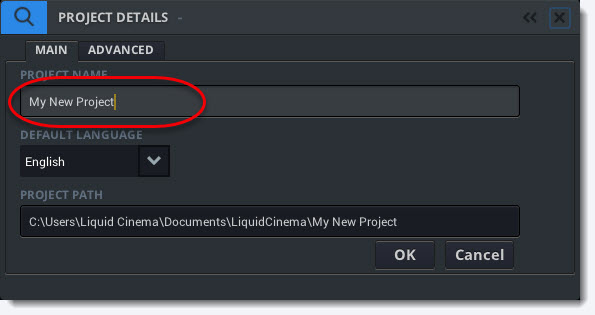
3. Choose a Default Language for your project.
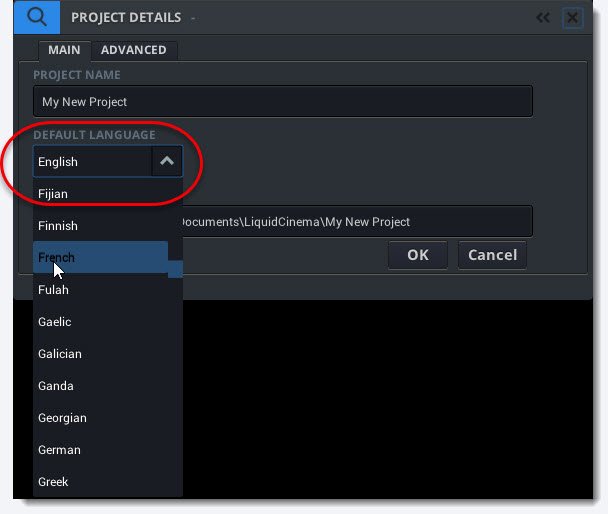
 

Default Language

Liquid Cinema allows multi-lingual authoring within a project. Once you set a default language for a project you will not be able to change it. However, you can add more languages to your project later.

4. Click OK.


5. Now the Branch Details Panel will appear. Click the Folder Icon


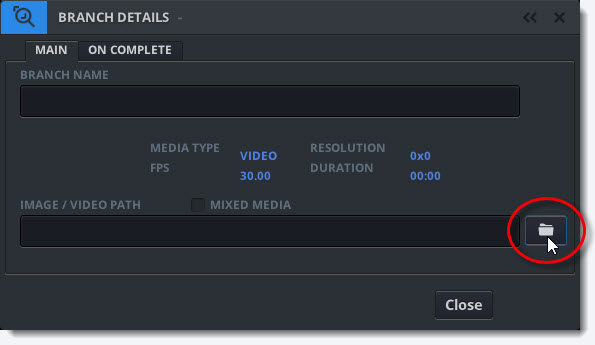
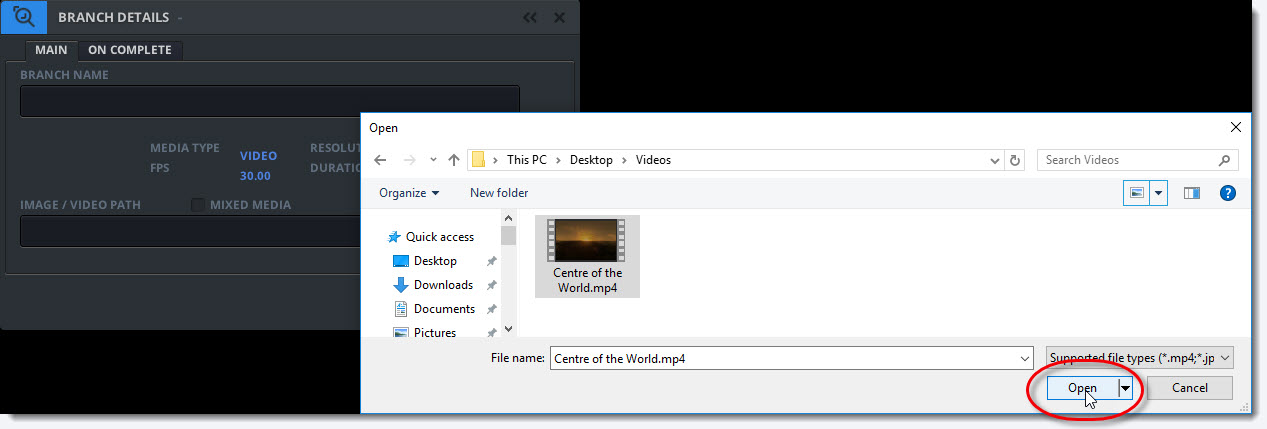
6. Use the Windows Explorer to choose a video or still image and click OPEN.


7. All videos or stills are considered Branches within Liquid Cinema. Give your Branch a name and click OK.


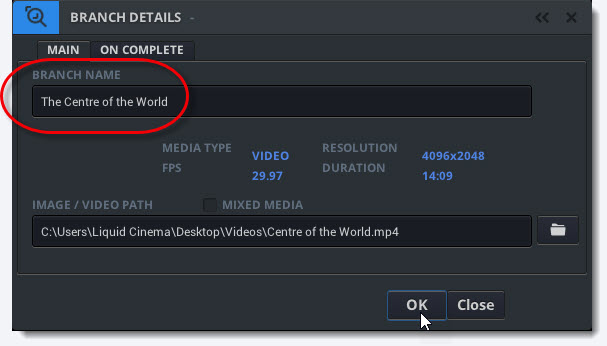
8. Your video or still will now be copied to your Project Folder. Watch the Status Bar in the Top Navigation to ensure the copy process is successful.


Importing Media

Importing Media from an external drive can cause problems on some systems. If you are having trouble using an external drive, copy your media to your main hard drive and import from there. Make sure you have enough space on your hard drive to import your media into your project.

9. After your media is successfully imported your video or still should appear in your viewer. The video is represented by a blue line in the Camera Timeline.


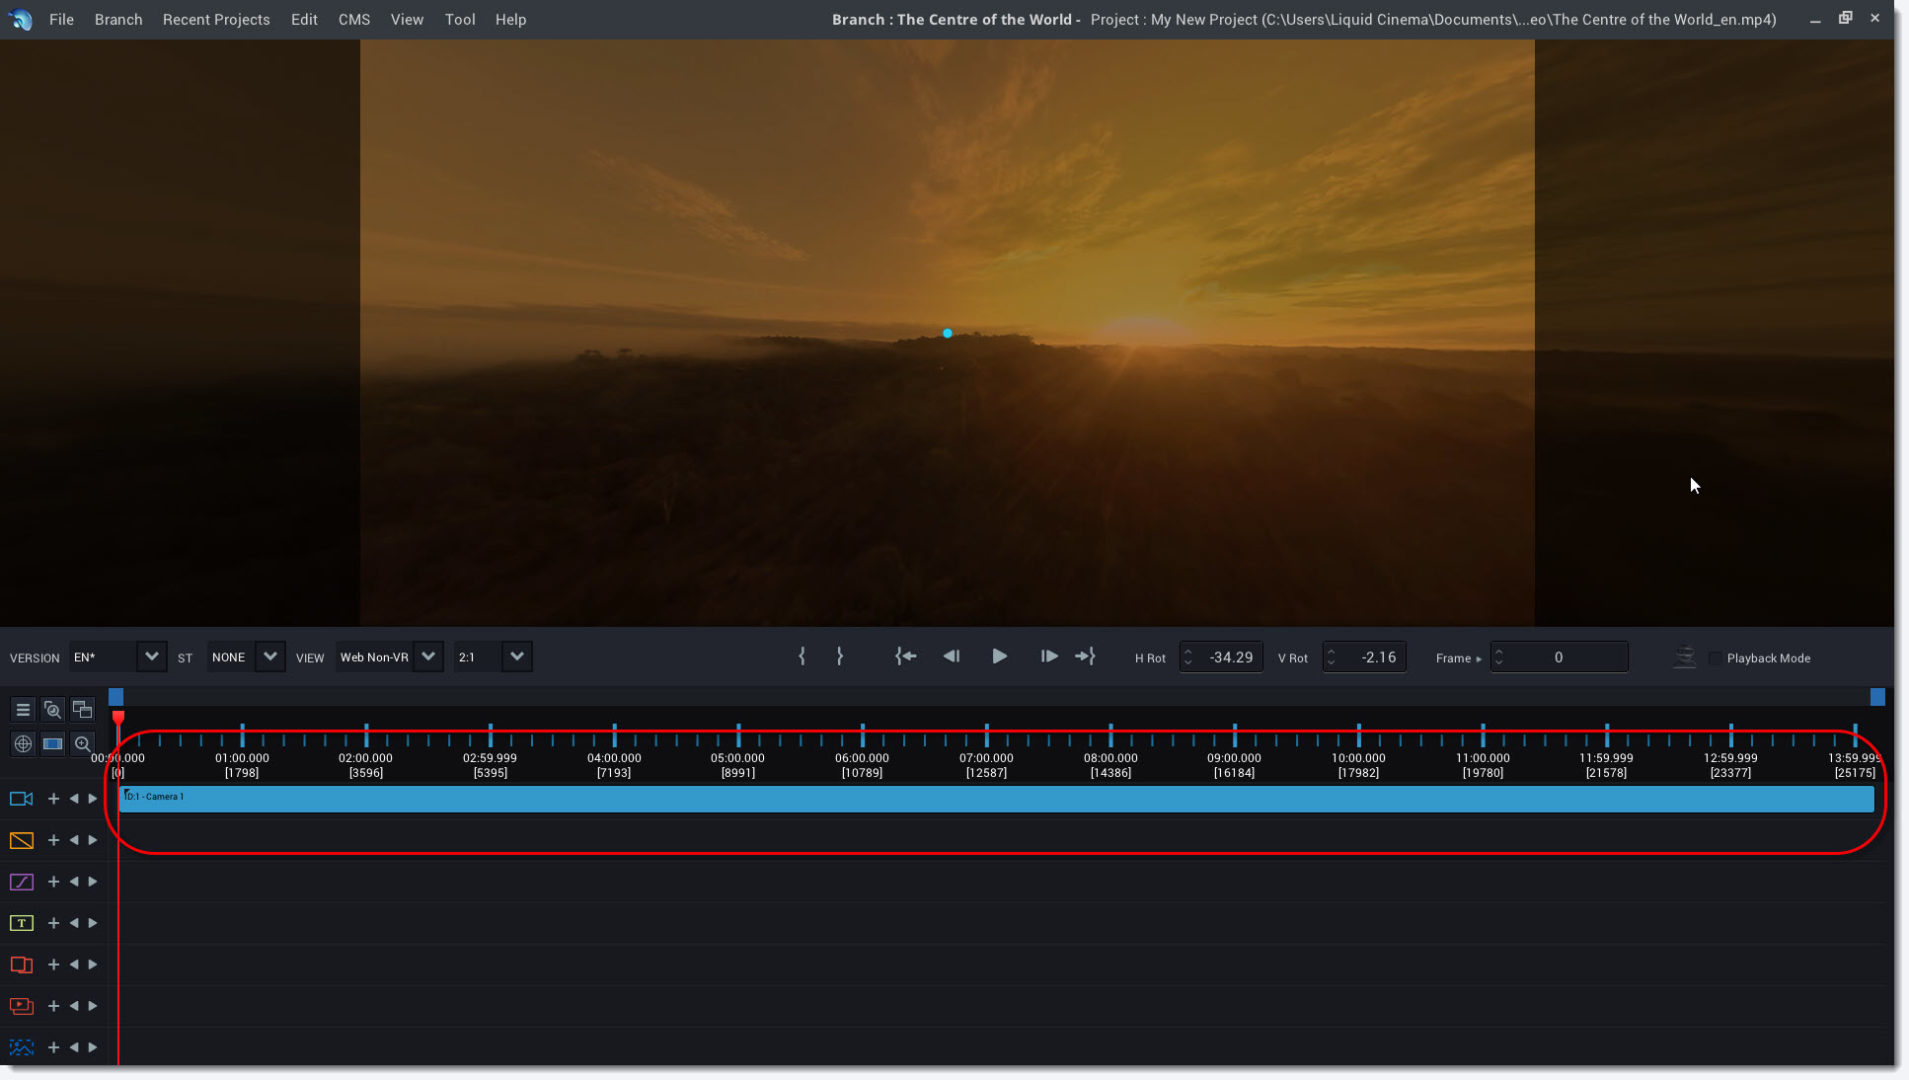
Note:  You can see the branch name, project name and project file path in the title bar.


7. Use the Camera Event Panel to set the correct projection mode for your branch. It will be set to 360 monoscopic projection by default.


FAQ – Liquid Cinema Workflow

  • Is Liquid Cinema a video editor?

    Liquid Cinema is not a video editor. Once you have locked your edit using the editing programme of your choice, you import your final video into Liquid Cinema, where you can author interactive events that are synchronized to the video at the time of playback. Liquid Cinema never touches the imported video file. The video file is used purely as a reference.

  • Do I need my final mastered, mixed and colour corrected 360 video when authoring in Liquid Cinema?

    No you don’t. Once you have locked your edit, you can start authoring in Liquid Cinema. The authoring tool does not touch the video file itself ever. All the events and interactions in Liquid Cinema are live rendered during playback. So if your final video file later has different colour correction, or a different sound mix it has no impact on the authored events.

  • What Video Editor do I need to cut my 360 degree video on?

    Liquid Cinema does not care how you stitched or edited the film as long as the result is contained in a standard 2:1 Equirectangular Diorama MP4 file.

  • What resolution do I need to output my 360 video on to author it in Liquid Cinema?

    It doesn’t matter what the resolution of the video file you use in the authoring tool is. You can use a lower resolution output if you want. The video only acts as a reference file in terms of the timing of the events that you are creating in the authoring tool.

    The timing of events in Liquid Cinema is frame based, so make sure you export your video at exactly the same frame rate as your final video!