Creating and Editing Events
In this section you will learn how to:
-
-
1
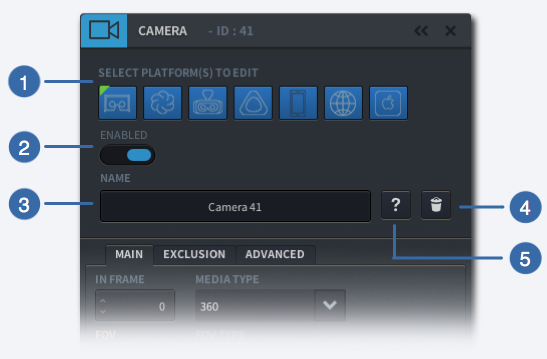
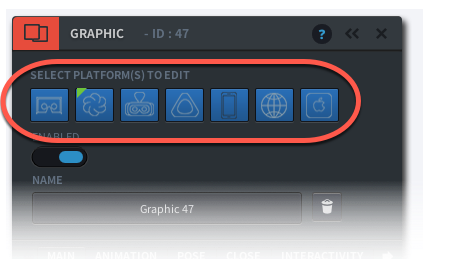
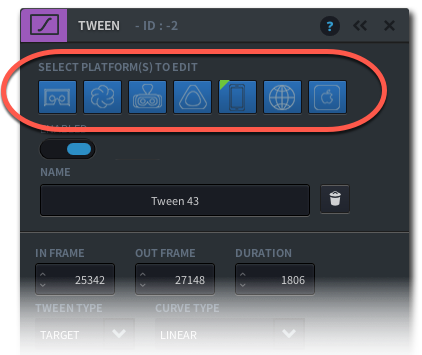
Platform Selector
Specify which platform(s) to which this Event will apply by pressing the respective platform icon:
 mobile (iOS/Android Cardboard)
 Daydream
 GearVR
 Desktop VR (Oculus Rift)
 360 Mobile flatscreen
 360 Desktop flatscreen
 360 TV (Apple TV)
-
2
Enabled
The checkbox enables or disables the camera event in the timeline.
-
3
Event Name
Allows you to give your event a unique name which makes it easier to later on identify it in the Event list.
-
4
Delete
Click “Delete” to permanently delete that Event across all platforms
-
Create a new Event
Events are indicated with different colour bars on the timeline. To add an Event on the timeline:
-
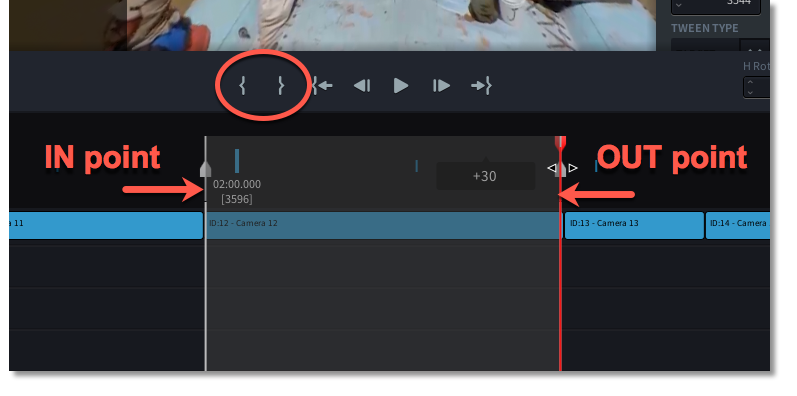
- Move the Playhead (red vertical line) to your desired IN point. Hit ‘i’ on your keyboard, or click the
 button on the Authoring Control Bar.
 - Move the playhead to your desired OUT point and hit the ‘o’ key or click
 on the Authoring Control Bar.
- Press the
 next to the Event icon to add a Camera, Fade, Tween, Title, Graphic or Hitbox.
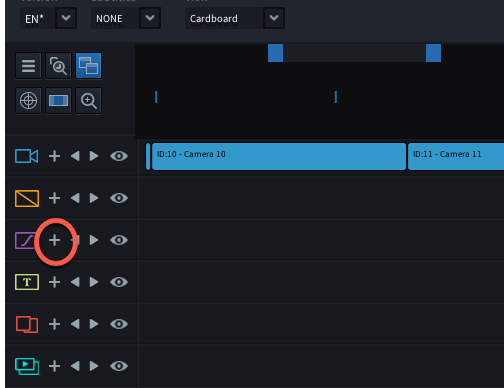
- A new Event will appear on your Timeline, indicated by a coloured bar between your IN and OUT point. The Event Editor panel has popped up, indicating that you are in editing mode.
- You can now Edit your Event.
- To leave Editing Mode, hit the ‘c’ key or click on the
 button of your Event panel

- Move the Playhead (red vertical line) to your desired IN point. Hit ‘i’ on your keyboard, or click the
To edit an existing event on the Timeline, double-click the coloured block and the Event Editing Panel will pop up.
Each Event Editing Panel has a Platform Chooser at the top of the panel. Blue coloured icons indicate those platforms that are being edited. When an event is first created, all platforms are selected to be edited.
Adjusting the Timing and Duration of an Event
Each event on the timeline have a Duration which is determined by the time between the IN-point and OUT point.
To Adjust the IN and OUT point of your Event:
- Double-click your Event on the Timeline to go into editing mode
- The IN and OUT handles are represented by white triangles at the top of the Event Timeline.
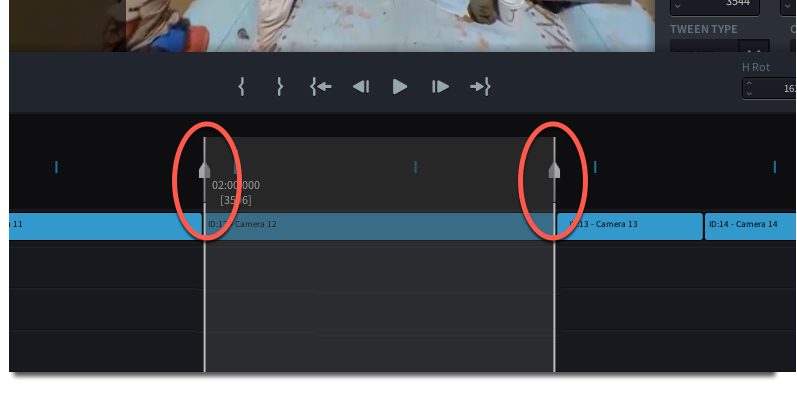
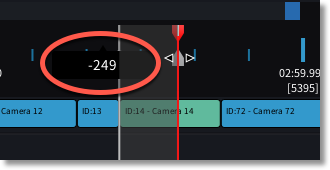
- As you move your cursor over the handle, notice how your cursor changes into two small black arrows, indicating you can move the IN or OUT point.
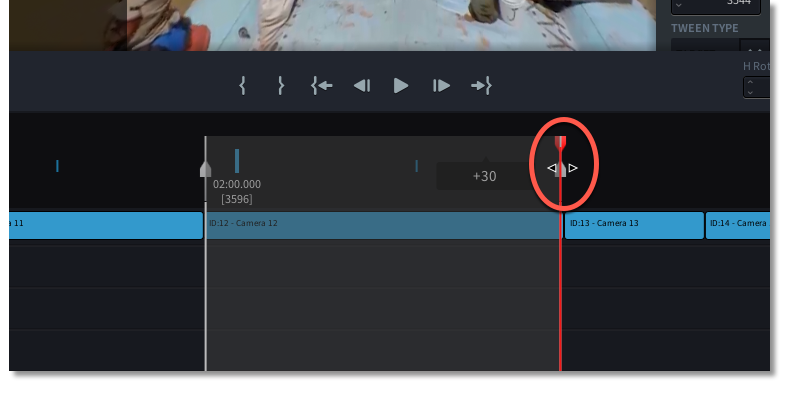
- Click and slide the handle to the left or right to adjust the timing of the IN or OUT point
- A black square to the left of your cursor indicates the number of frames by which you are offsetting the IN or OUT point.
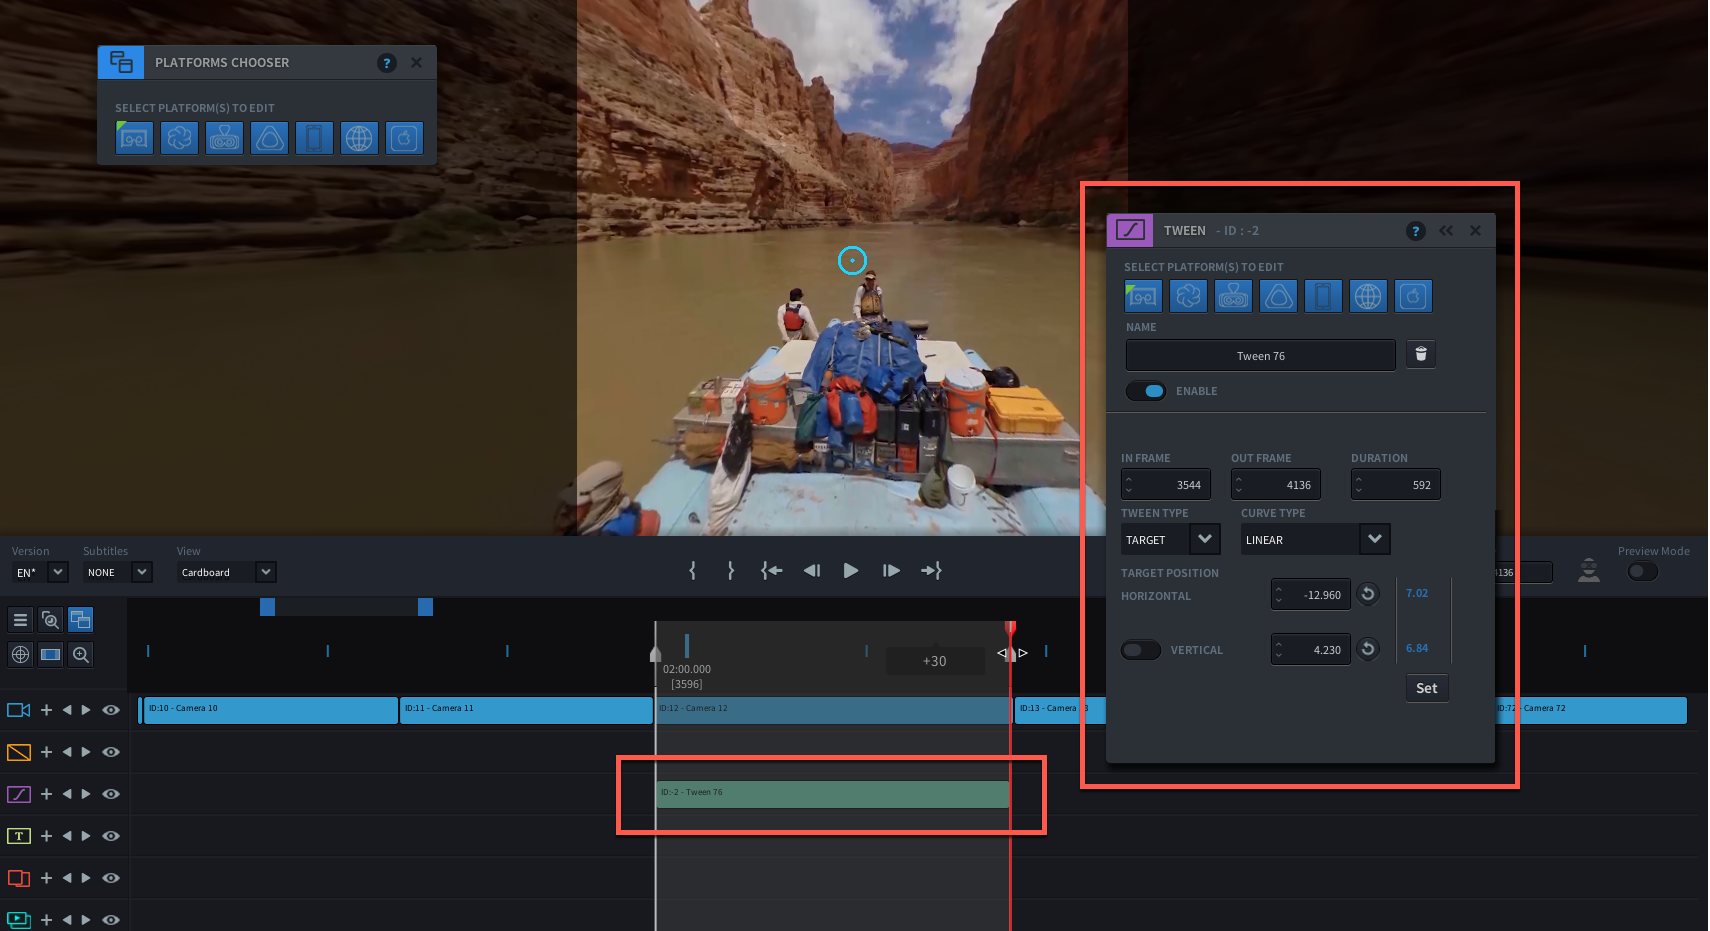
Another way to change the IN and OUT point or DURATION of your Event, is by doing it in the Event Editor panel:
- Double-click the Event to open up the Event Editor panel
- Most Events allow you to set an IN FRAME, OUT FRAME and DURATION. Change the values by directly entering the desired frame number, or time into one of the fields
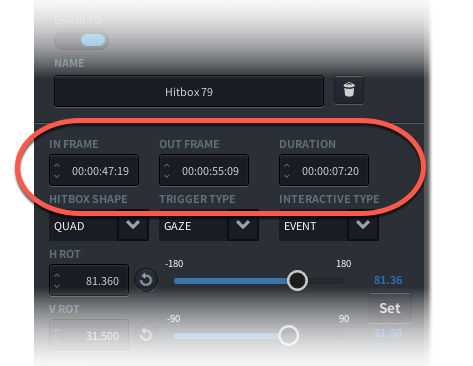
- the IN FRAME, OUT FRAME and DURATION are displayed either by frame number (F), or time unit (HH:MM:SS). To switch the display, click on the Time icon on the Authoring Control Ba.


How to Edit Events
- To edit an event, double-click the coloured bar on the Timeline and the Event Editing Panel will pop up.
- At the top of the Event Editing Panel is the PLATFORM CHOOSER which lets you select those platforms you wish to edit. Blue coloured icons indicate platforms that are in editing mode. When first editing an event, its best to have all platforms selected, so you can make changes and tweaks to individual platforms later on.
- Make sure the ENABLE button is activated. By default, the Enable button is switched ON. If you wish to disable an Event on the Timeline but not delete it, switch it to OFF (grey).

- Give your event a unique name by entering it in the Name Field. This will help you identify your Event more easily later on.

- Now you are ready to change the settings of your event. For specific instructions and event panels, go to:
How to Delete an Event
- Double Click on the Event on the Timeline or from the Event List pane
- The EVENT Editor will appear
- Click on
 to the right of the Event Name

- A confirmation appears – select “Delete” to permanently delete that Event, or “Keep” to cancel the request
Warning
Once deleted, the panel will close and the Event will disappear from both the Timeline and the Event list.