PIP User Interaction
Trigger a PIP transition through user Interaction
By default, the PIP video is activated upon start of the event. But you may not want to have the video start automatically, but launched through a user interaction. The type of user interaction that triggers the PIP to play can be specified per platform, so that you can optimize the interaction for each platform.
- Open the PIP Event Editor by double-clicking the event on the Timeline.
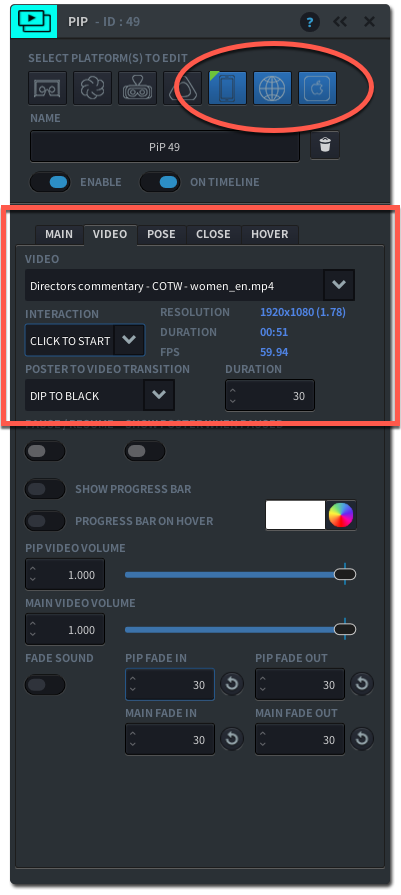
- from the PLATFORM SELECTOR select those platforms for which you wish to set the user interaction
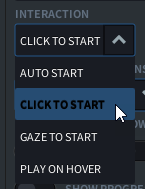
- on the VIDEO tab, use the INTERACTION drop-down menu to select the trigger type of your PIP
- Choose the INTERACTION type from the drop down menu. Use CLICK TO START if the user should click on the Poster Image in order to launch the PIP video; or GAZE TO START if the user should gaze at the Poster Image in order to launch the PIP video; or PLAY ON HOVER if the user should hover over the Poster Image with the cursor in order to launch the PIP video. CLICK TO START and HOVER are typically only used for non-VR platforms, GAZE TO START is typically used for VR platforms
- Under POSTER TO VIDEO TRANSITION select the transition type you wish to use: CUT, DIP TO BLACK, or DISSOLVE.

- When using either DIP TO BLACK or DISSOLVE, you can assign a duration (number of frames) to the transition. Enter a value >0

- Play around with these settings and play back your PIP in the Preview Window to see how the different transitions play back. Make sure you have Preview Mode toggle on during playback to see the PIP in action
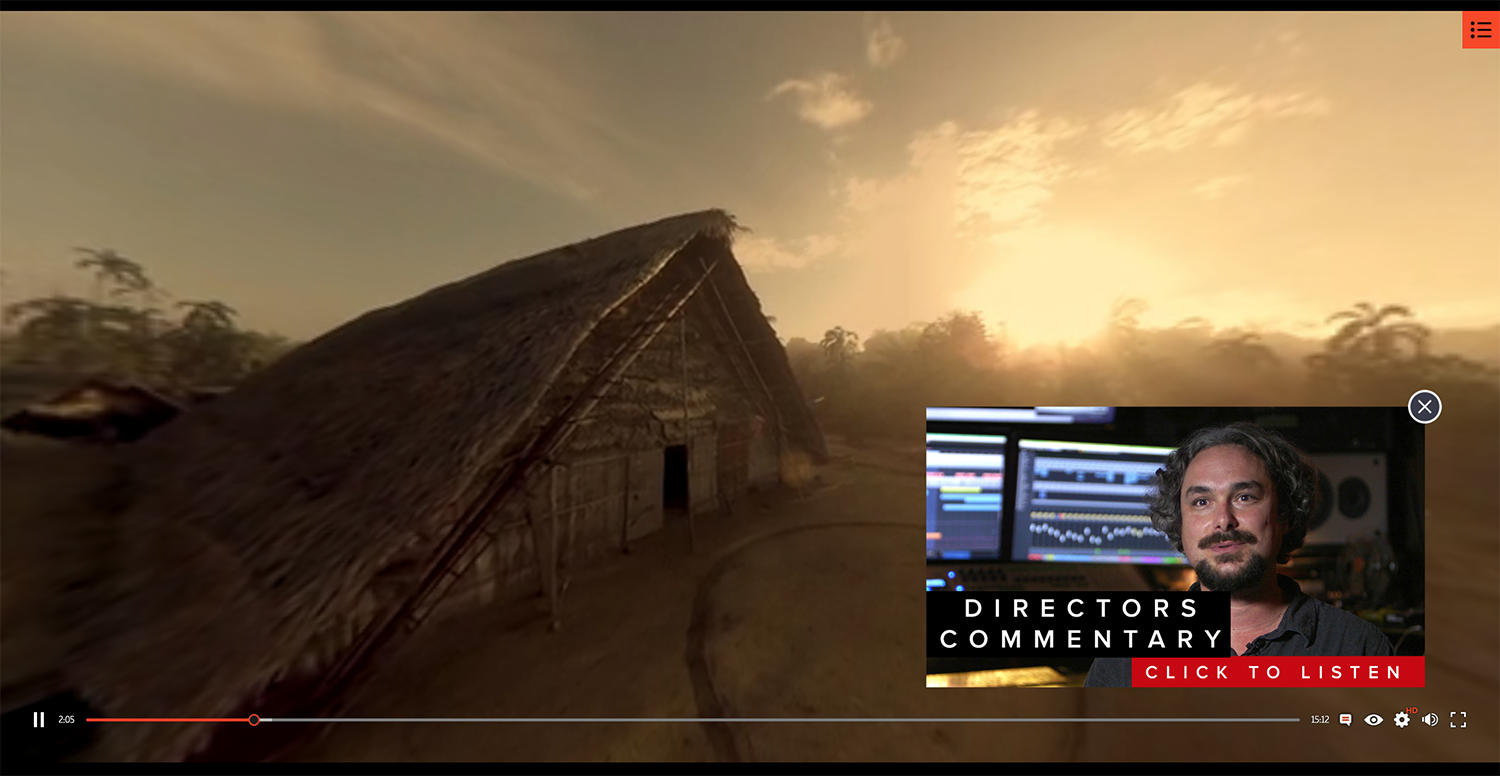
In the example above, the PIP’s user interaction is set to CLICK TO START for the non-VR platforms. The PIP video will only start when a user clicks on the Poster Image with the mouse, or taps on the Poster Image on mobile screens.
Configure the playback behaviour of your PIP
You can set the way your PIP video displays by modifying its behaviour.
- Open the PIP Event Editor by double-clicking the PIP Event in your Timeline
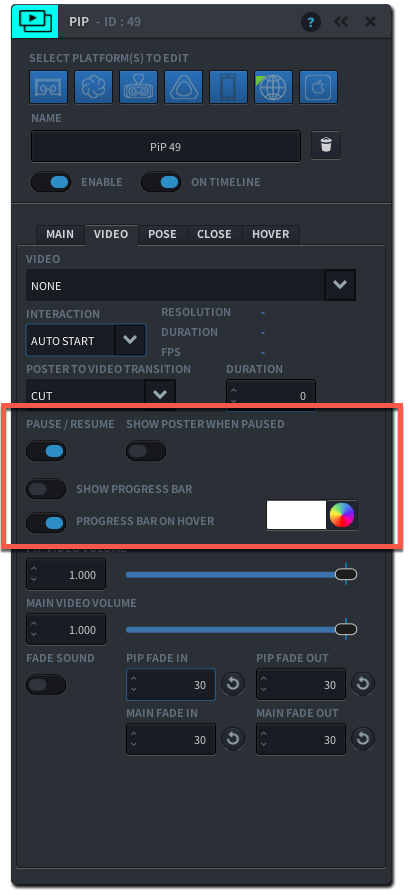
- On the Video Tab, in the middle of the panel there is a section where you can configure your PIP’s player interface.
- PAUSE / RESUME : if turned on, your user will be able to pause the video by pressing/clicking on it.
- SHOW POSTER WHEN PAUSED: if turned on, your user will see the Poster Image when the video is paused
- SHOW PROGRESS BAR: if turned on, the user will be able to see a progress bar indicating how much has been watched versus the total duration of the video.
- the COLOUR PICKER allows you to pick a colour for the progress bar
- PROGRESS BAR ON HOVER: if turned on, the progress bar will appear only if the user gazes at or hovers over the video
Make a smooth audio transition using fades
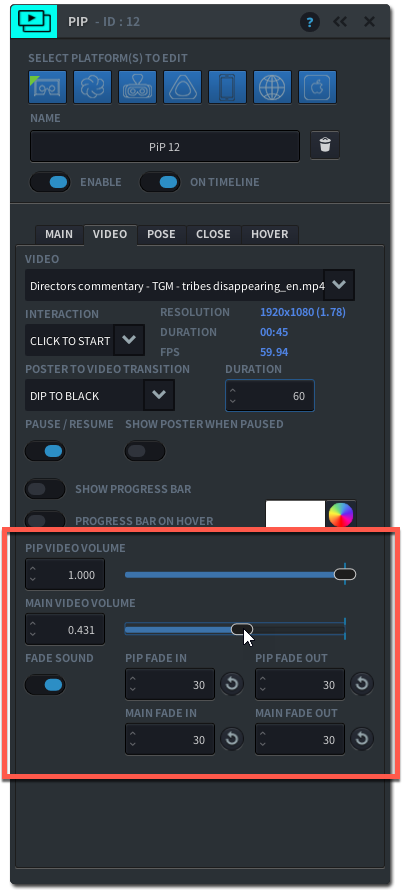
When you launch a Picture in Picture video that has sound, you may want that sound to stand out and not be overpowered by the main video’s sound. The PIP Editor allows you to adjust the volume of your main video’s sound and add an audio fade in and fade out to both the PIP and main video in order to smooth out the audio transition
- Open the PIP Event Editor by double clicking your PIP event on the Timeline
- On the VIDEO tab, adjust the PIP VIDEO VOLUME and MAIN VIDEO VOLUME respectively by entering a value 0<1. When leaving both values at 1, both videos will play at 100% of their audio levels during the PIP playback. The MAIN VIDEO VOLUME is only affected during playback of the PIP. Changing this value will not affect the main video’s volume in general.
- Enable the FADE SOUND toggle to add an audio transition to your PIP. Use the PIP FADE IN to gradually increase the sound of your PIP video at the start of the event by entering a duration or frame number. Use PIP FADE OUT to gradually decrease the sound of your PIP at the end of the event. Similarly, you can add a MAIN FADE IN to gradually decrease the sound of your main video as your PIP video starts playing, and add a MAIN FADE OUT to gradually increase the sound of your main video towards the end of your PIP video, to your original main video’s audio level.
- Play around with these settings and play back your PIP in the Preview Window to see how the different transitions play back. Make sure you have Preview Mode toggle on during playback to see the PIP in action.
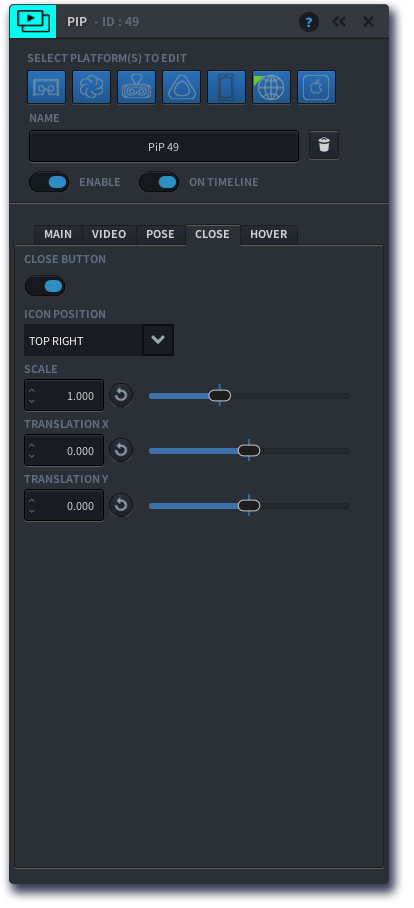
Add a Close Button to your PIP
The close button allows a user to manually close the PIP poster image or video by clicking on the button.
- Open your PIP Event Editor by double clicking the event on the Timeline
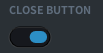
- On the CLOSE tab of the Event Editor, turn on the CLOSE BUTTON TOGGLE
- Choose from the drop down menu under ICON POSITION how you want the close button to align to your PIP frame: top right, top centre, top left, bottom right, bottom center or bottom left
- You can adjust the size of the close button under SCALE by entering a number or moving the slider
- You can adjust the relative positioning of the close button by changing the TRANSLATION X and TRANSLATION Y values.
- When you are done, hit the ‘c’ key to close the editing panel.
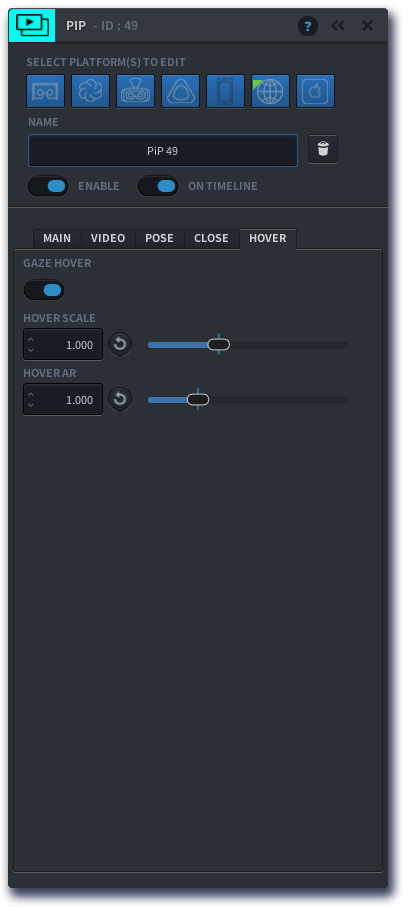
Add a Hover State to your PIP
By adding a hover state, you can make the PIP poster image and video temporarily change size when the user gazes at or hovers over the picture. This feature may be helpful to indicate to the user that the PIP is a dynamic element with which they can interact.
- Open the PIP Event Editor by double clicking the PIP event on the Timeline
- On the HOVER tab of the Event Editor, enable the GAZE HOVER button

- Adjust the HOVER SCALE to a value >1 to make the PIP larger, or <1 to make it smaller
- Adjust the HOVER AR to change the aspect ratio of your PIP. With a hover AR <0 you increase the width relative to the height, and with an AR>0 you increase the height relative to the width
- Close the PIP editor by hitting the ‘c’ key or press the close button