Using Text
Liquid Cinema allows you to add live-rendered text to your projects, that you can place either in a 2D or 3D space. The Text Editor allows you to adjust the font, formatting, colour, positioning and background of your text.
In this section you will learn how to:
Add a Text to your project
- Choose the In-point on the TIMELINE where you want your text to appear
- Choose an Out-point on the TIMELINE and click on the
 sign next to the
  Text Icon to add a new Text Event
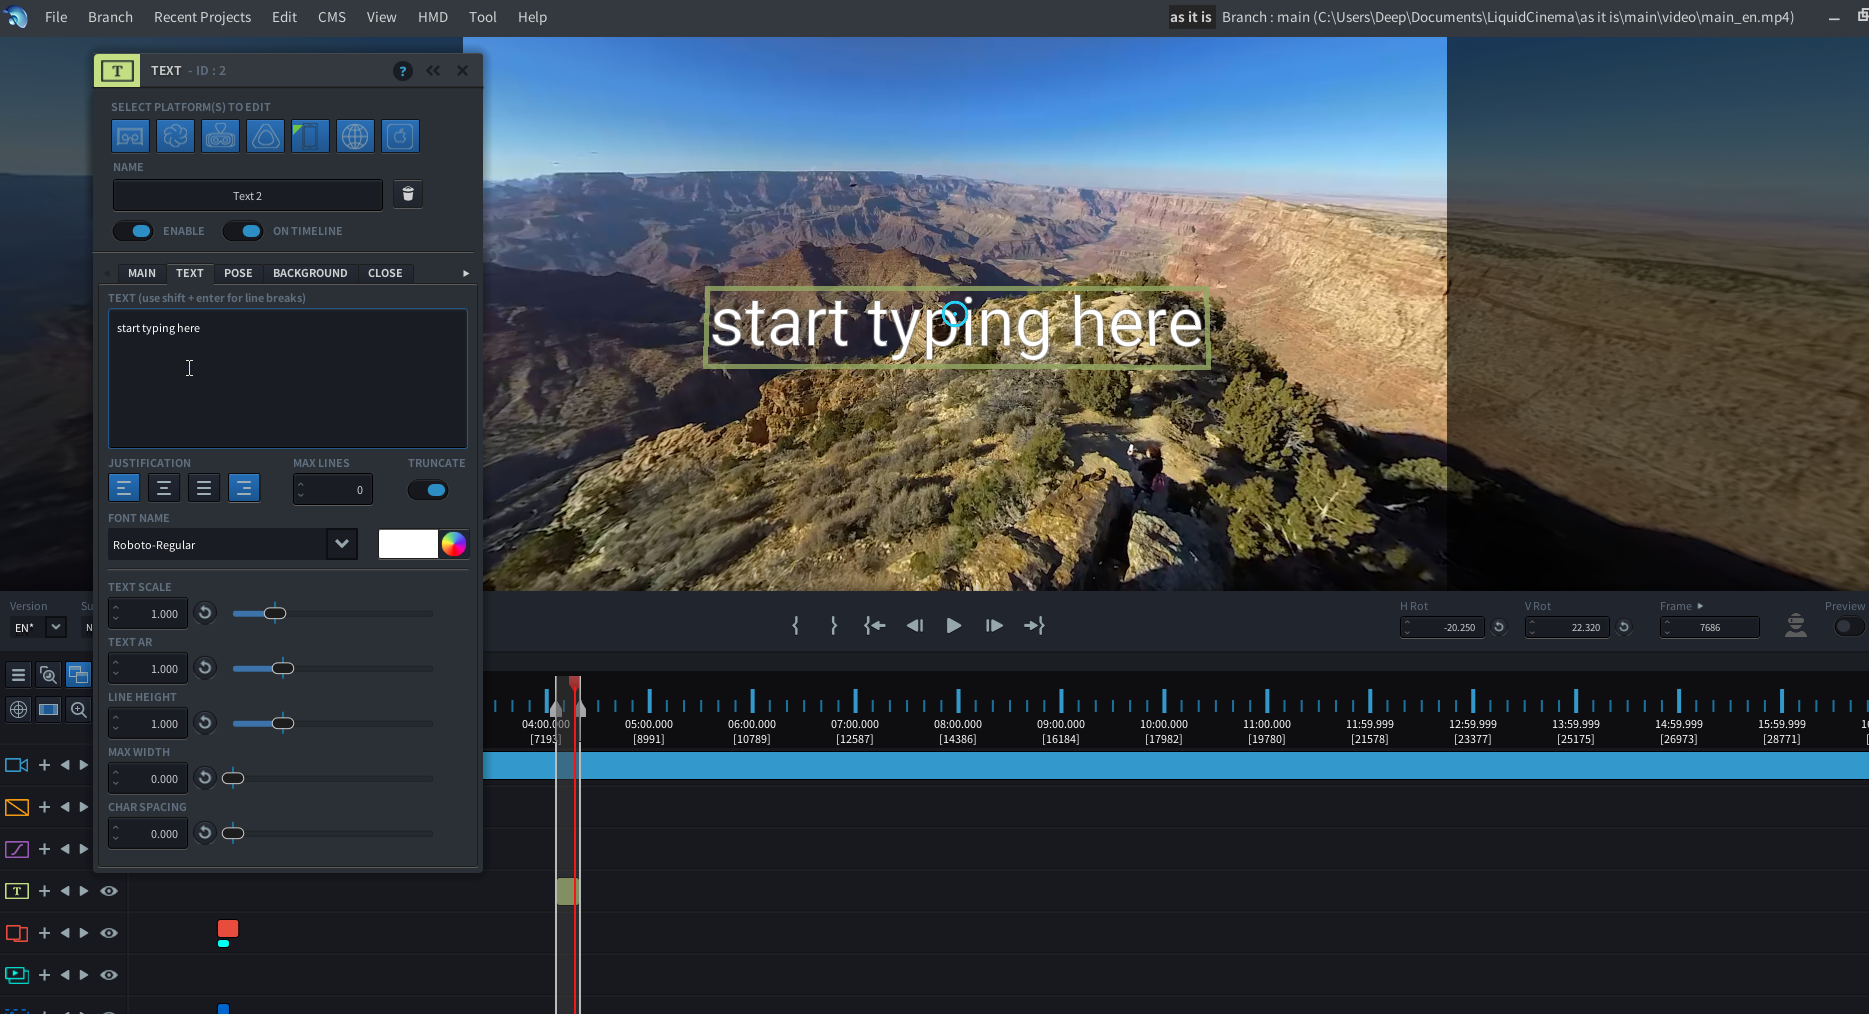
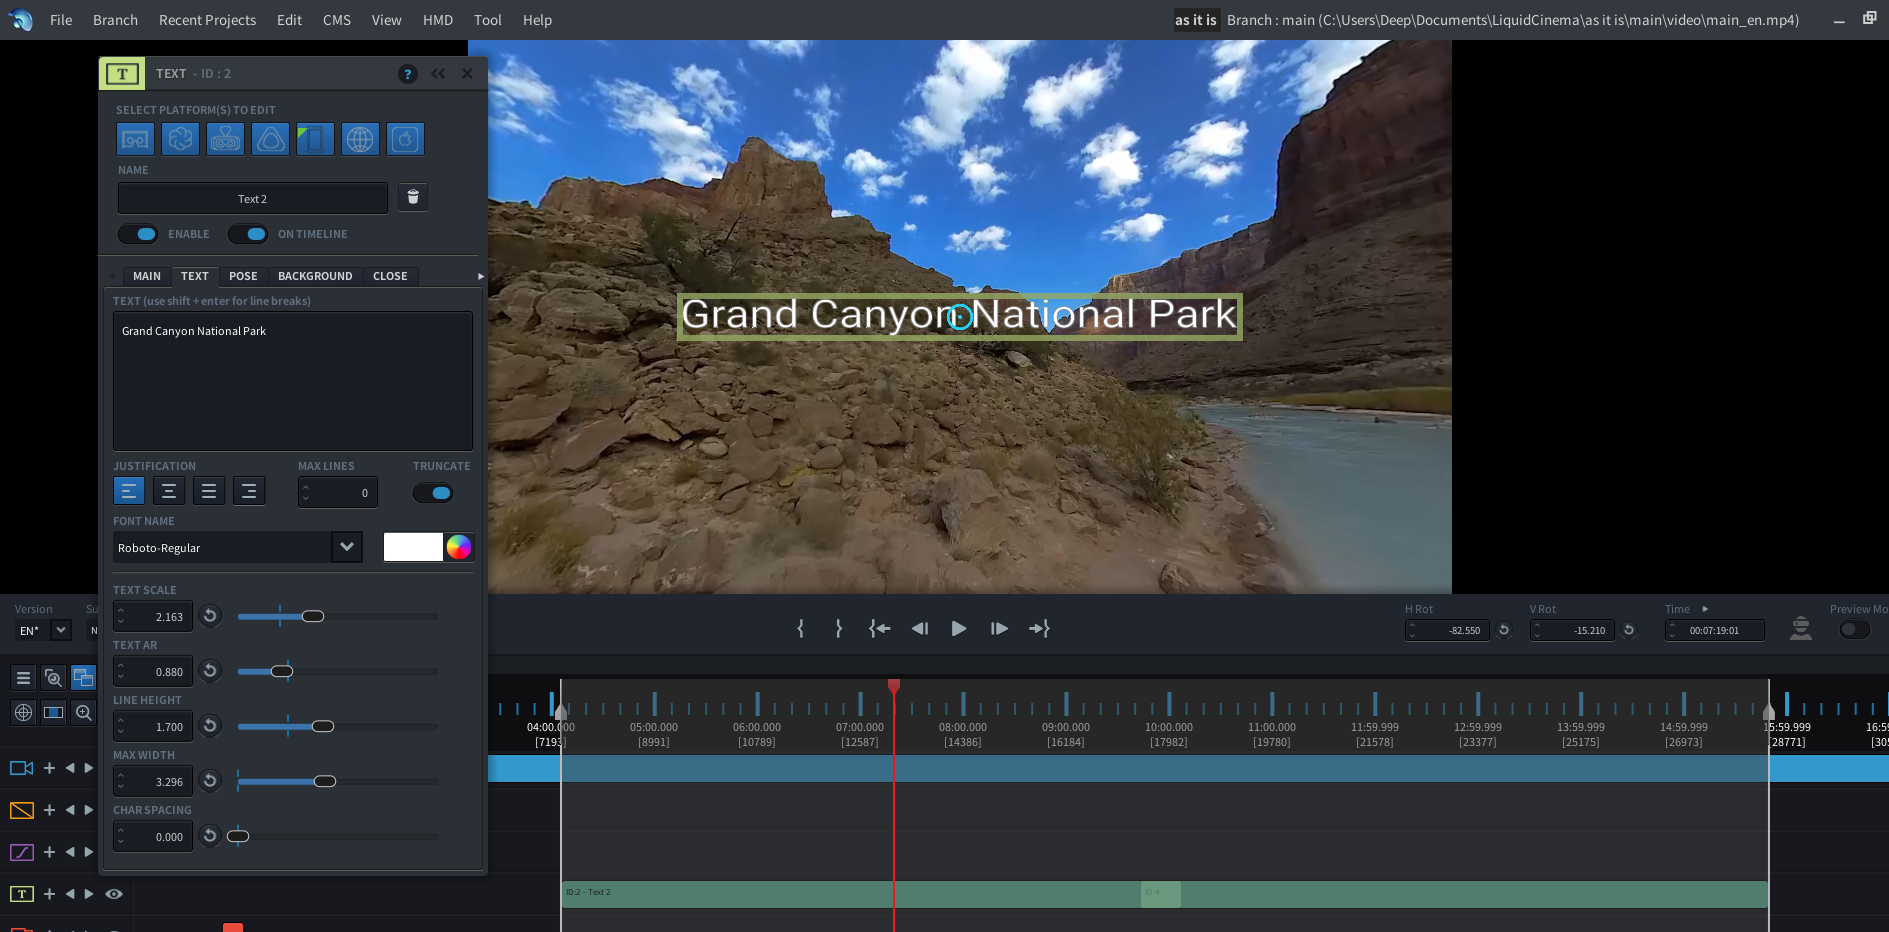
 - The TEXT EDITOR will open up. On the TEXT tab, in the TEXT field, start typing or pasting your text. Use the shift+enter combination on your keyboard to create a line break
- When done, press ENTER. Your text will now appear in the Preview Window
- To fine-tune the timing of your Text event, you can adjust the IN FRAME, OUT FRAME or DURATION on the MAIN tab, or by simply sliding the event handlebars in the Timeline.
Read more about adjusting the Timing and Duration of an Event here.
Position your Text within a 2D or 3D space
The TEXT Editor allows you to place text either within a two dimensional frame, or within a three dimensional space as part of your 360 sphere. You can set this property per platform, so within one project your text can show differently depending on what platform it is being watched.
To position a 2D text:
- Open the TEXT EVENT EDITOR by creating a new text event or double-clicking an existing text event on the Timeline.
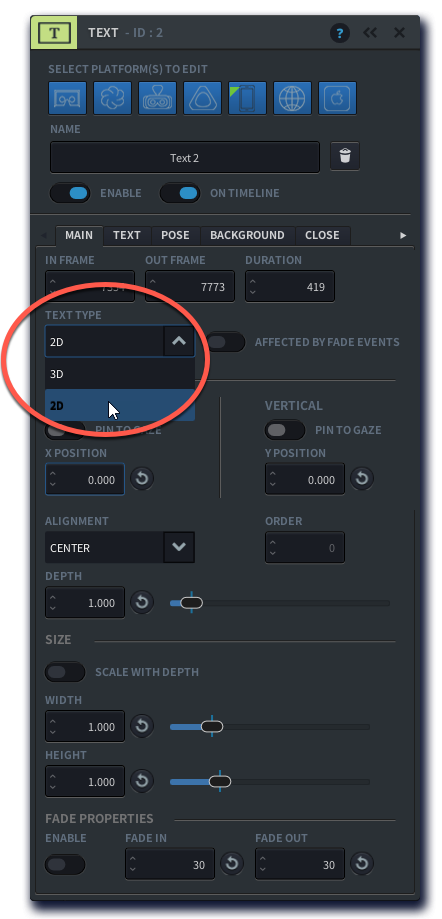
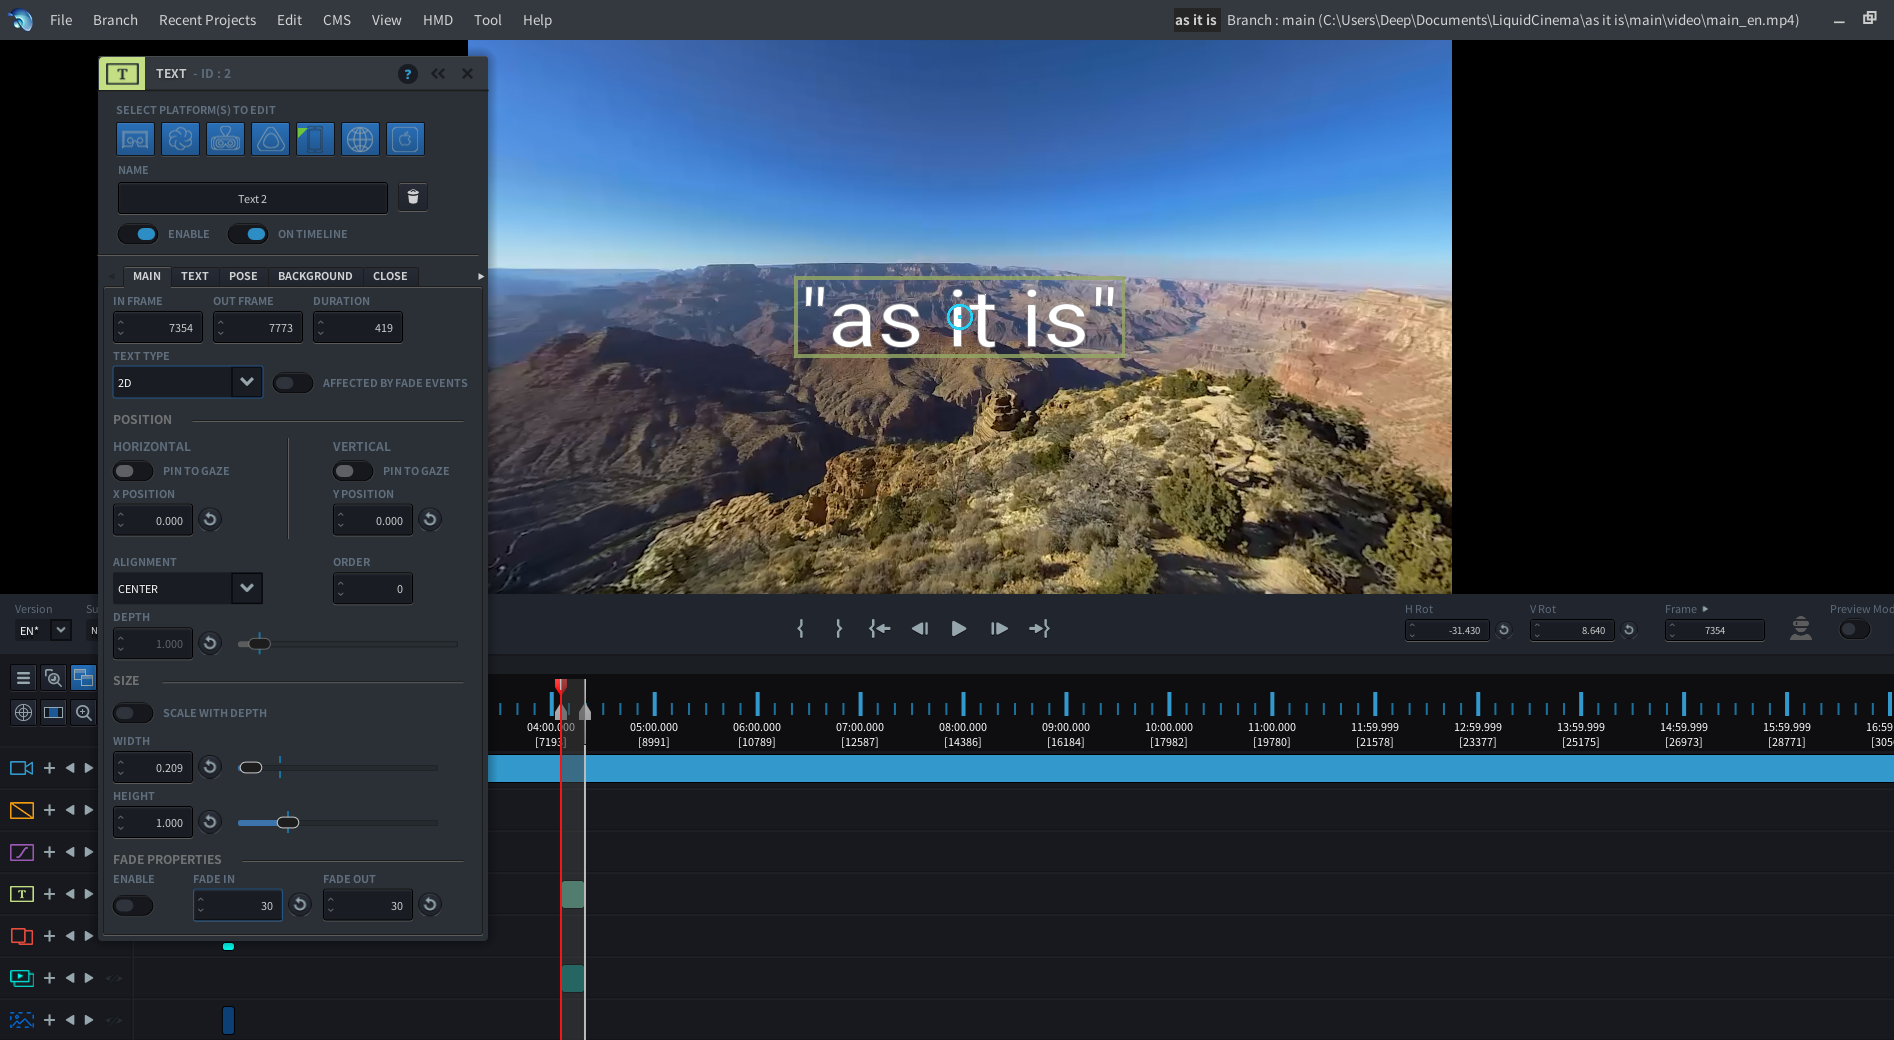
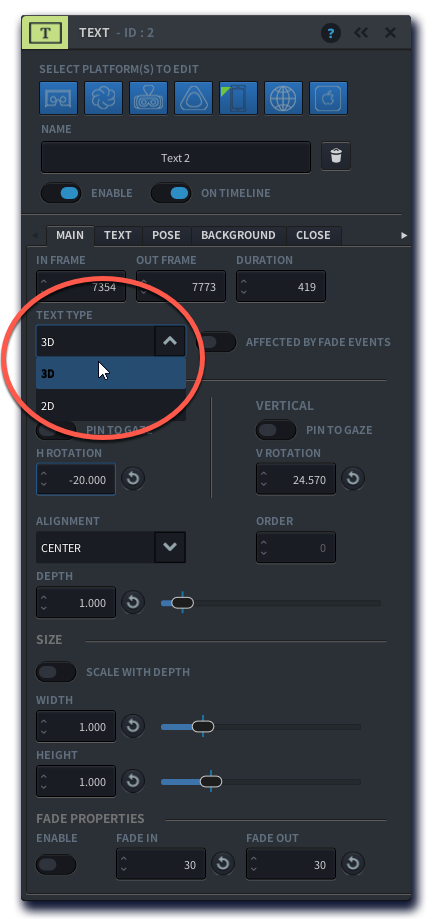
- On the MAIN tab, choose 2D from the TEXT TYPE drop down menu
- Set the X-POSITION and Y-POSITION to adjust the placement

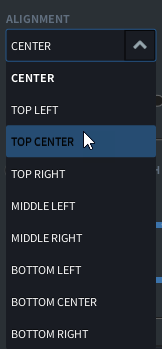
- You can also change the positioning within the frame by choosing from the ALIGNMENT drop down menu
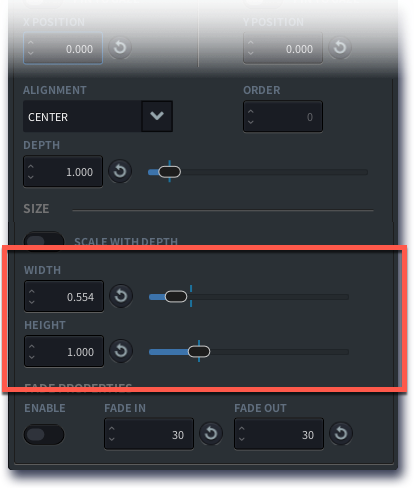
- Under SIZE, use the WIDTH and HEIGHT sliders to adjust the size and aspect ratio of your text.
- Hit the c-key to close the editing panel, or close by clicking the ‘x’
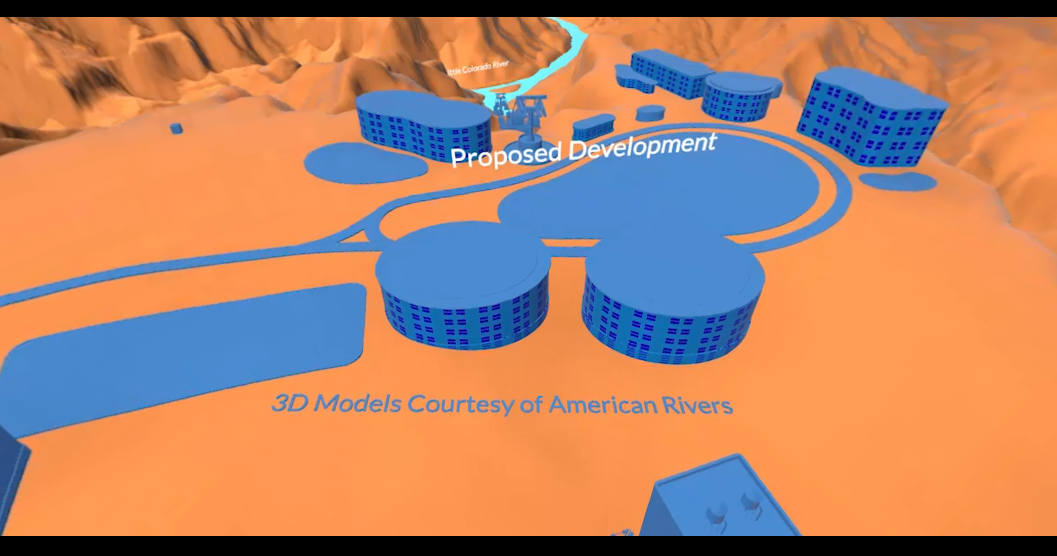
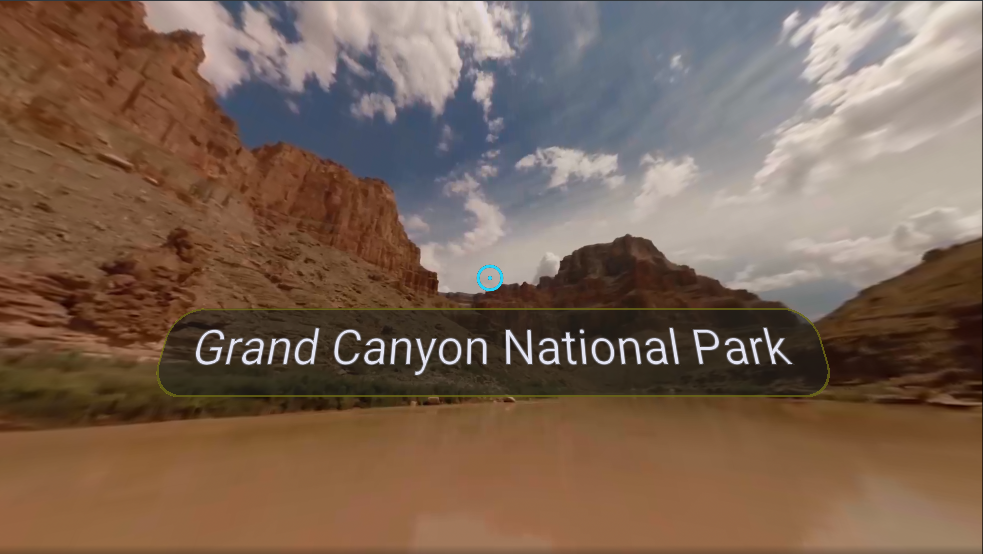
Take a look at the 2D text below. For a non-VR player it is fine if it appears as a 2D text in the middle of the screen and stays in the middle regardless of where you look.
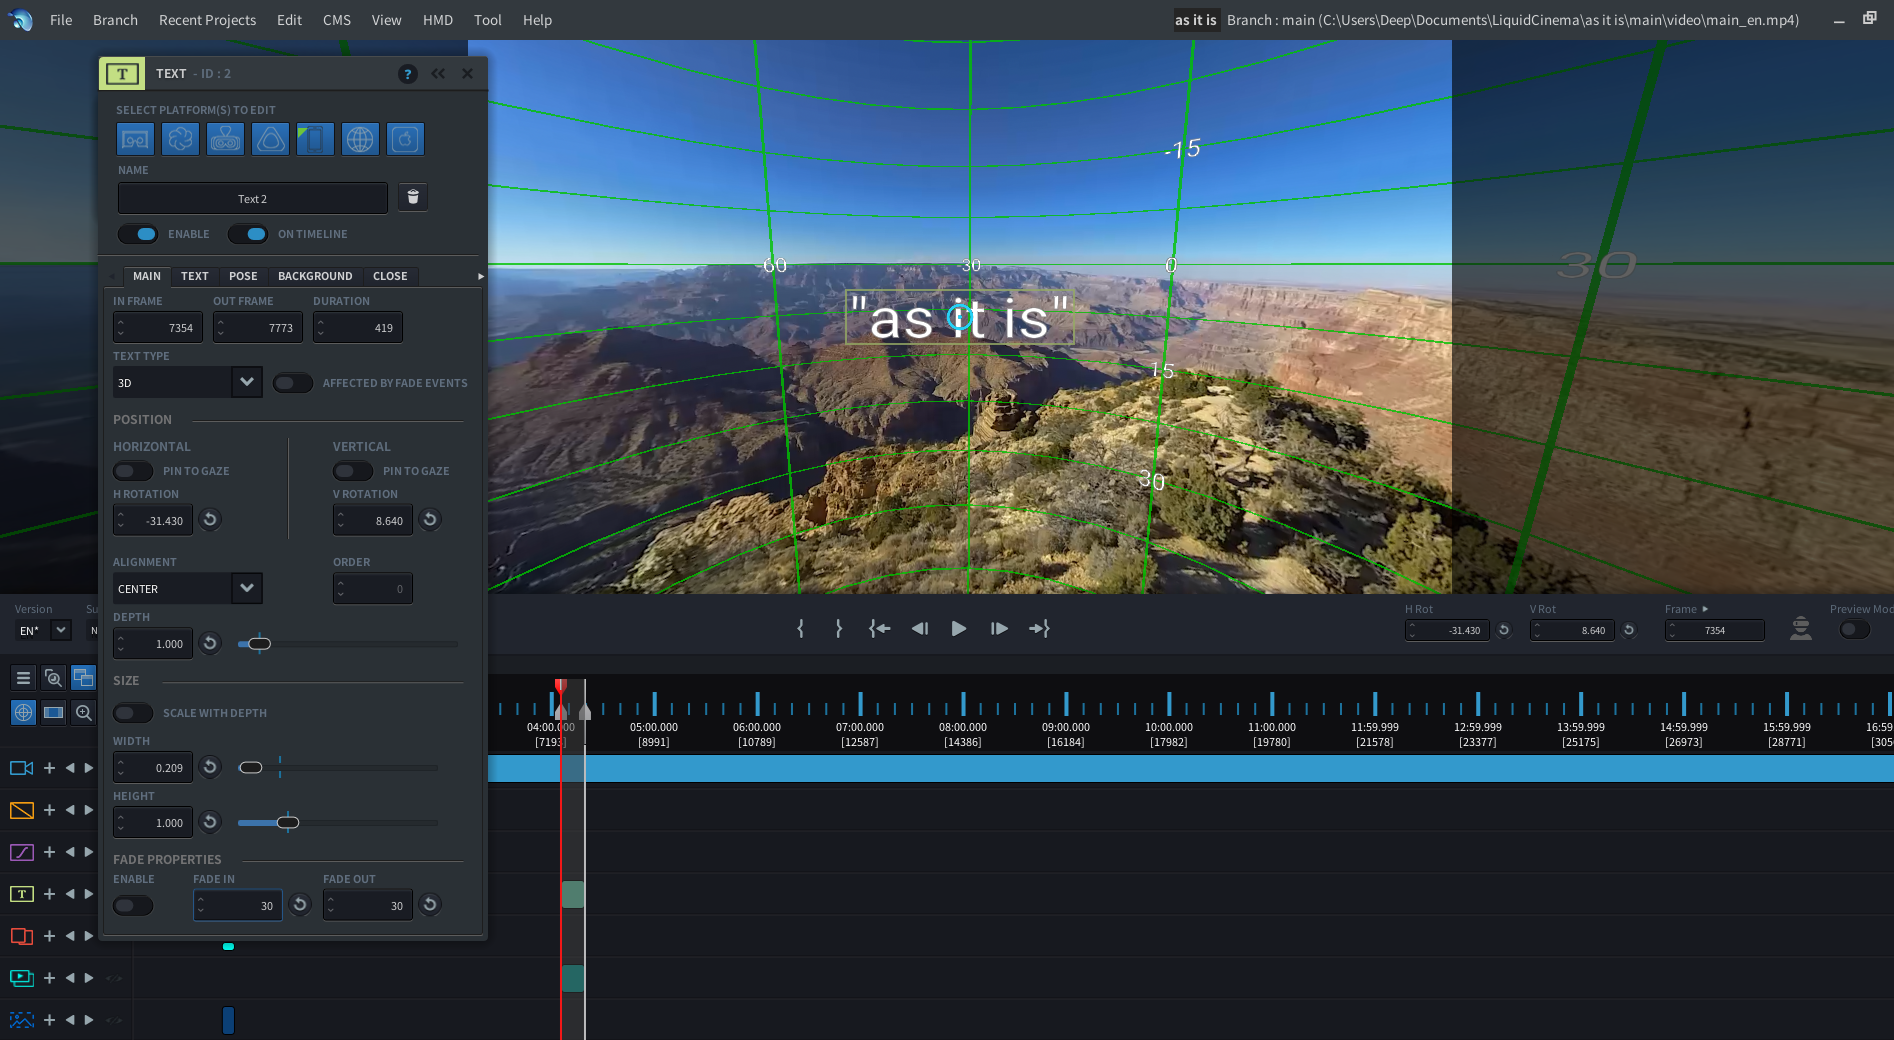
In VR however, you may not want the title to ‘follow’ you wherever your gaze, but have it pinned to the sphere. In the example below, the Text Type is set to 3D:
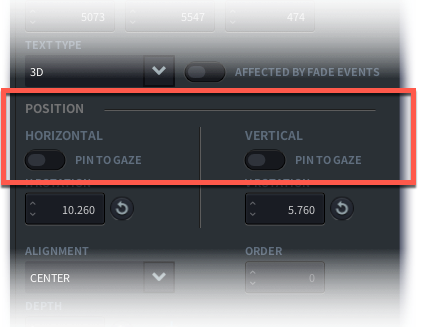
To position a 3D-type Text:
- Open the TEXT EVENT EDITOR by creating a new text event or double-clicking an existing text event on the Timeline
- On the MAIN tab, choose 3D from the TEXT TYPE dropdown menu
- Set the H ROTATION and V ROTATION to place your text along the horizontal and vertical rotation coordinates
- Adjust the DEPTH positioning within the 360 space by changing the numbers in the DEPTH field. In VR, DEPTH is important for perceived distance of the text in relation to the viewer
- If you want to adjust the depth without changing the perceived size of the text, turn on the SCALE WITH DEPTH toggle
- Use the WIDTH and HEIGHT values to adjust the size and aspect ratio of your text event
- Hit the c-key to close the editing panel, or close by clicking the ‘x’
If you want the text event to appear there where the user looks, regardless of where they were looking at before, you may want to enable PIN TO GAZE.
Learn more about using PIN TO GAZE
Add a Fade to your Text
- Open the TEXT EVENT EDITOR by double-clicking your TEXT event on the Timeline
- At the bottom of the MAIN tab, you will find the FADE PROPERTIES. Click the ENABLE button to turn on a fade
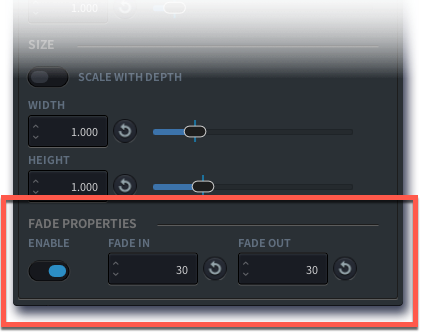
- You can adjust the duration of the fades in the FADE IN and FADE OUT fields by entering a number >0
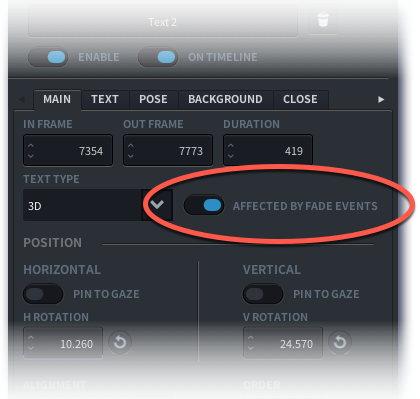
- You can also allow the text to be affected by other fade events that are present in the timeline, by enabling the AFFECTED BY FADE EVENTS button
Change the layout of your Text
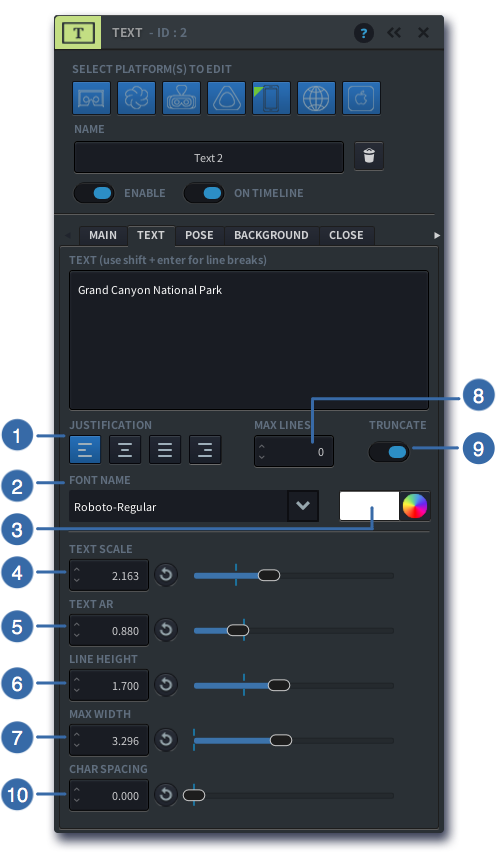
- On the TEXT tab of the TEXT EDITOR, set the justification (alignment) of your text to Left, Centre, Justified or Right
- Select the font under FONT NAME or import a font into Liquid Cinema
- Use the COLOUR PICKER to choose a colour for your text
- Adjust the size of your text using TEXT SCALE
- If needed, change the aspect ratio of your text using TEXT AR
- If using a text that spans over multiple lines, use LINE HEIGHT to adjust the distance between the lines.
- Your text event is contained in an area that is marked by a bounding box (green border). You can custom set the boundaries using MAX WIDTH
- You can also limit the number of lines by entering MAX LINES >1. When set to zero, there is no maximum
- You can use the TRUNCATE toggle to allow the characters to be cut off if they don’t fit the maximum width
- If needed, adjust the character spacing by using the CHAR SPACING slider
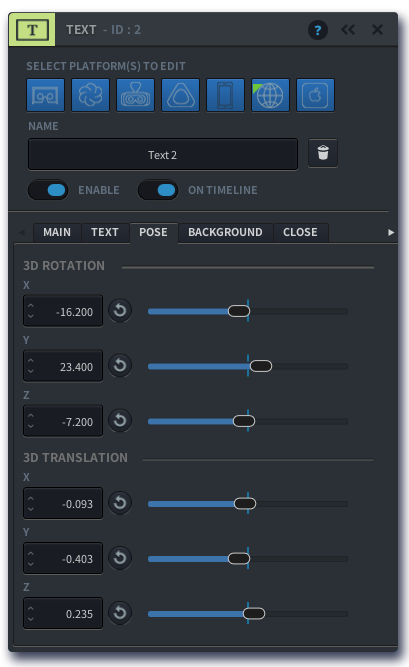
Adjust the Pose of your Text (for 3D-type Text only)
When your Text is set to 3D-type, you are able to fine-tune the positioning in 3D space using the POSE tab on the Text Event Editor.
![]()
- Open the TEXT EVENT EDITOR by double clicking the Text event on the Timeline
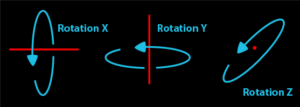
- On the POSE tab, there are two types of values you can change. 3D ROTATION will rotate your text around its centre axes. You can change the X, Y and Z 3D ROTATION values by adjusting the sliders, or entering a number between -180 and 180.
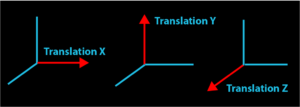
- 3D TRANSLATION will manipulate the position of your text within a 3D-coordinate system. Y TRANSLATION affects the position along the vertical (Y) axis, X TRANSLATION affects the position along the horizontal axis, and Z TRANSLATION affects the position along the Z axis.
- play around with the values and watch the text in the Preview Window change. If you need to reset the values to their original position, hit the refresh
 key to the left of each slider.
 - When you are satisfied with the position, hit the ‘c’ key to close the editing panel, or click on the ‘x’ button.
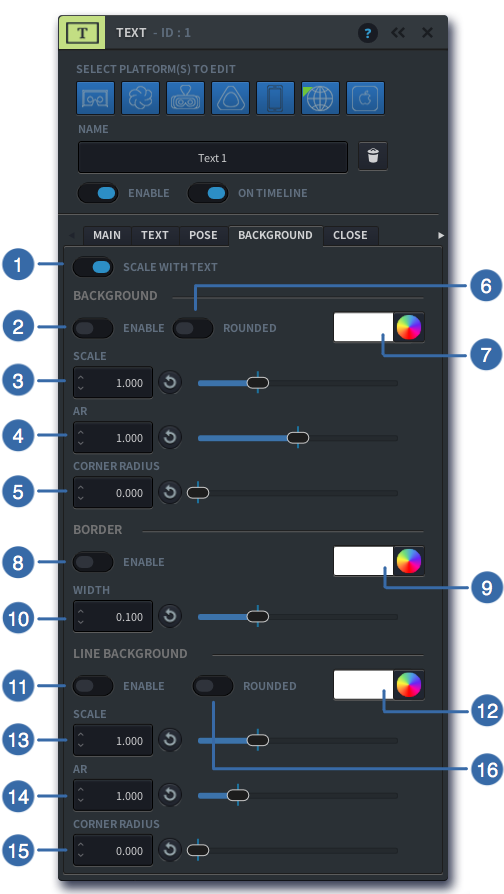
Add a Background to your Text
- Click on the BACKGROUND tab of the TEXT editor. Turn on SCALE WITH TEXT if you want the background to scale with your text, or turn it off if you wish to shape the background independently.
- Click the ENABLE button to switch the background colour on
- Use the SCALE slider to adjust the size of your background
- Use the AR slider to adjust the aspect ratio of your background
- If you want rounded edges, you can add a CORNER RADIUS to the background, by entering a number >0 or adjusting the slider
- Enable the ROUNDED button to allow for rounded edges
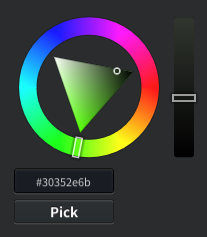
- Select your background’s colour and transparency value using the COLOUR PICKER. Use the wheel (A) to choose a colour, and the slider (B) to adjust the transparency
- If you want a border around the background, click the ENABLE button
- Select a colour of your border using the COLOUR PICKER
- Enter the border WIDTH or use the slider to adjust the thickness
- If you want to highlight a part of your text, click the ENABLE button to give your text a line background
- Pick a colour of your highlight using the COLOUR PICKER
- Adjust the size of your highlight using the SCALE slider
- Adjust the Aspect Ratio using the AR slider
- I using rounded edges, you can adjust the CORNER RADIUS using the slider
- Make sure ROUNDED is enabled if you are using rounded edges for your highlight
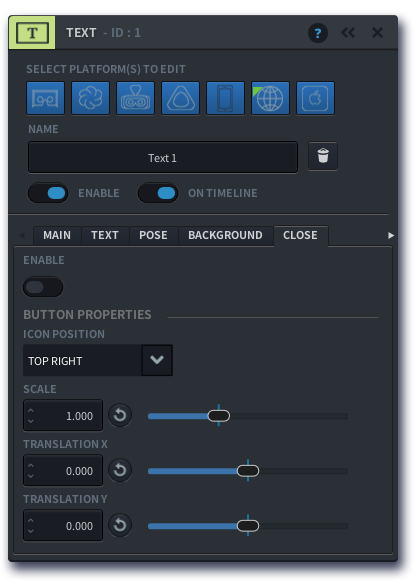
Add a Close button to your Text
The close button allows a user to manually close the text by clicking on the button
- Open the TEXT Event Editor by double clicking the event on the Timeline
- On the CLOSE tab of the Event Editor, turn on the CLOSE BUTTON toggle
- Choose from the drop down menu under ICON POSITION how you want the close button to align to your text: top right, top centre, top left, bottom right, bottom centre or bottom left
- You can adjust the size of the close button under SCALE by entering a number or moving the slider
- You can adjust the relative positioning of the close button by changing the TRANSLATION X and TRANSLATION Y values
- When you are done, hit the ‘c’ key to close the editing panel.