Multi Language Authoring
Liquid Cinema fully supports a multi language workflow and allows you to author your project in multiple language versions. When starting your project, you are asked to select the default language. During authoring, you can add as many additional languages as you wish, and modify each language’s assets as needed.
In this section you will learn how to:
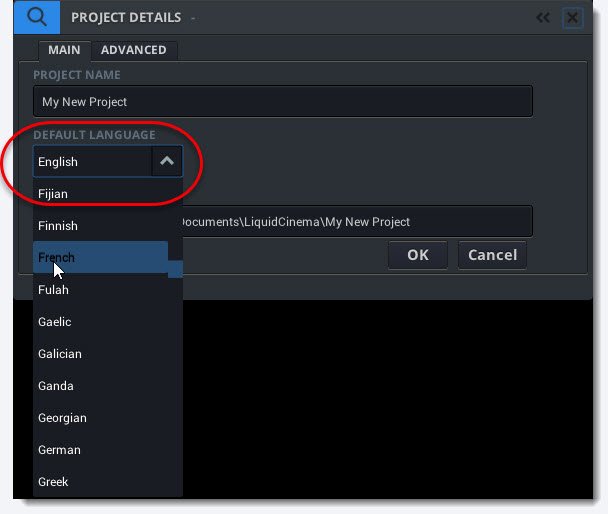
Default Language
Upon starting a new project, you are asked to select the Default Language. The language you select as the default language of your project is the language that is associated with the first video or still asset that you import. It is also the language that is by default displayed on the playback platform.
Create Multiple Language Versions
Any assets (graphics, videos, subtitles) that are part of your Liquid Cinema project are associated with a language version. By default, all imported assets are automatically assigned the Default Language which you have set upon starting your project.
To create another language version
- Import the new language asset by dragging the file onto the Preview Screen. Make sure you are using the same asset name, so the Authoring tool knows an existing asset needs to be replaced for a new version. In this example, I am replacing an English title graphic with a French one.
- A popup window will ask you to choose the asset’s language. By default, the language field will display the language that is set as your Default Language (in this case that is English)
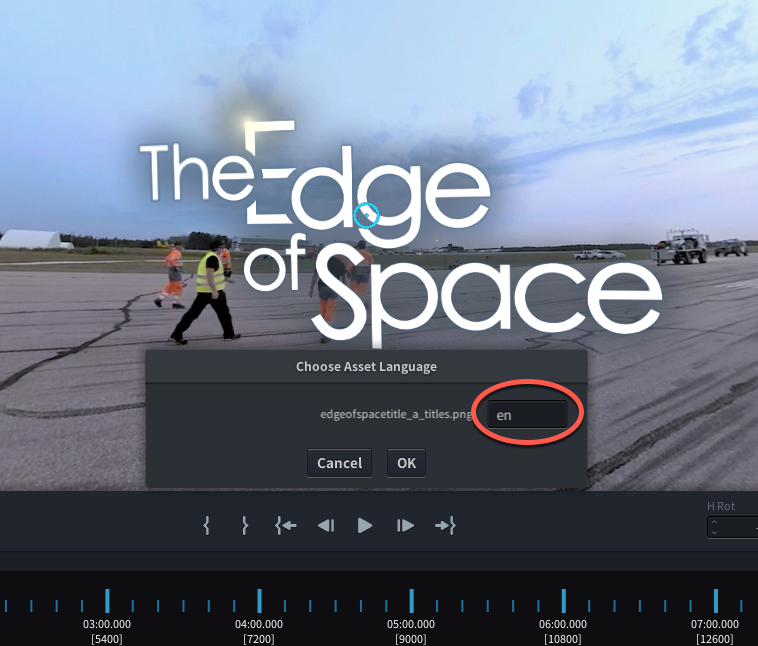
- Change the language input to the language that your asset is in. In this case, I import a French title so I enter ‘fr’. See our reference list of language codes.
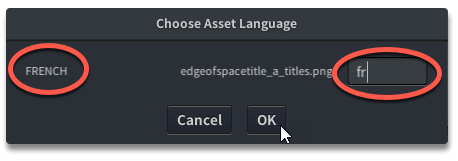
- Click OK. You will not see anything changed yet in the Preview Window, as you are still looking at the default version display.
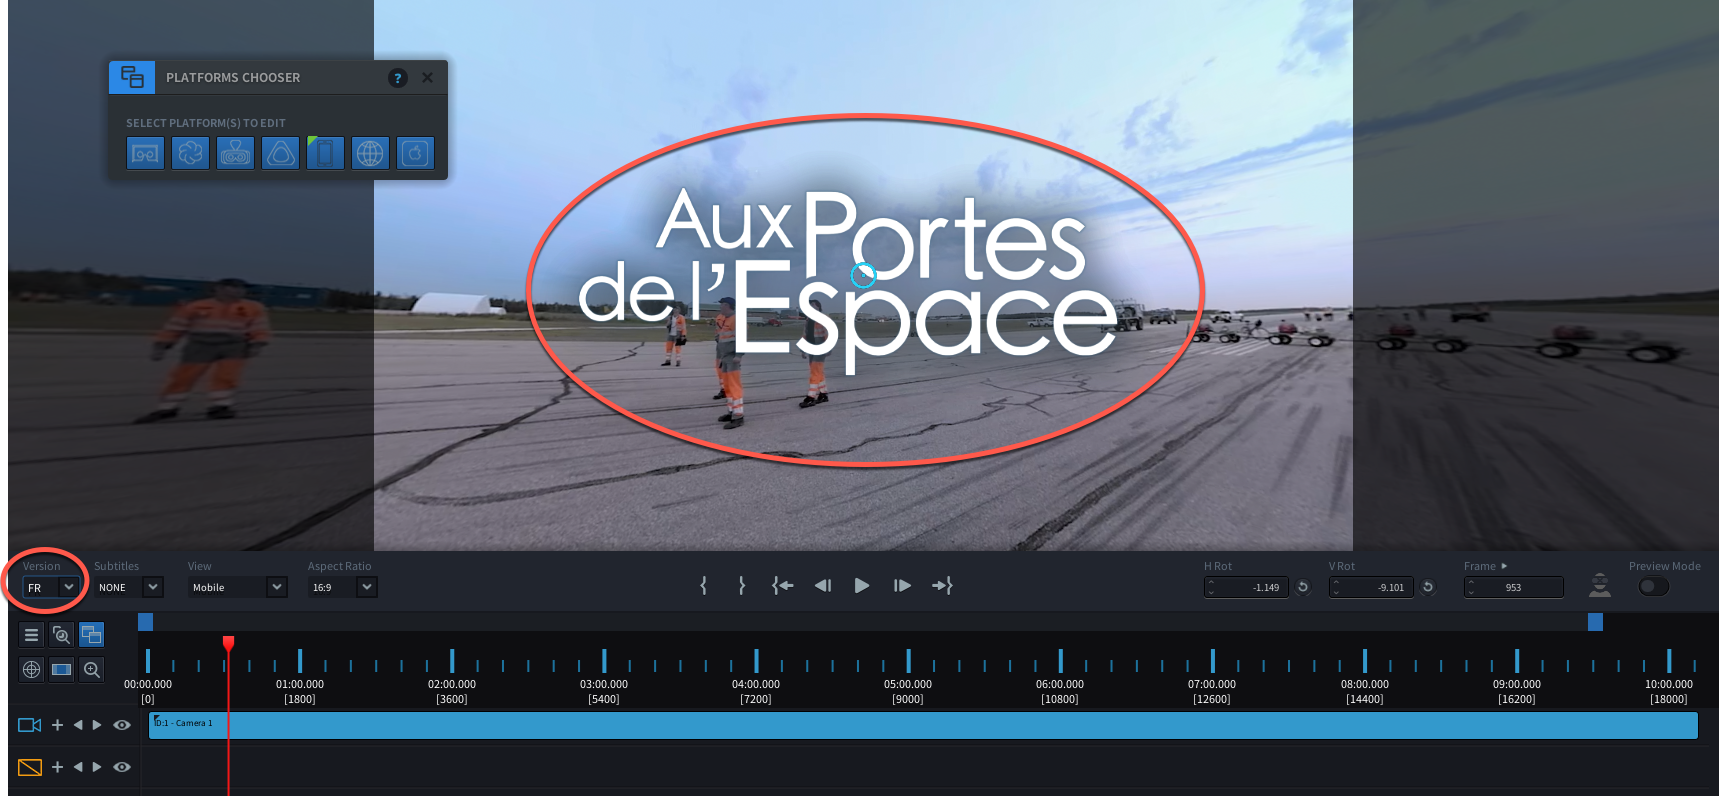
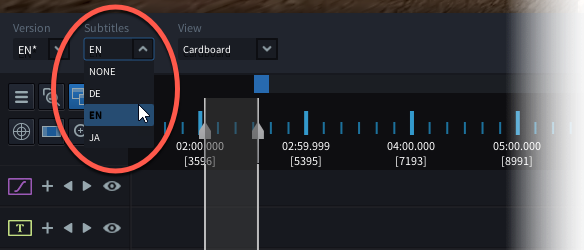
- In order to switch to the new language version your project, you will have to change the Display Language. On the Authoring Control Bar, click on the dropdown list under ‘Version’
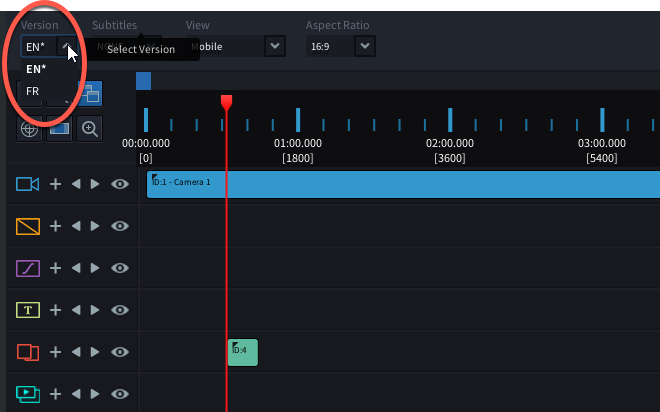
- You now see there is an additional language to your Version list – in my case FR for French. Choose the new language you want to display.
- The Preview Window will switch all assets to their French version.
To create another language version using a Video
- Import the new video language by dragging the video file onto the Preview Screen. Make sure you are using the same asset name as the original video, so the Authoring tool knows an additional version should be created for an existing asset
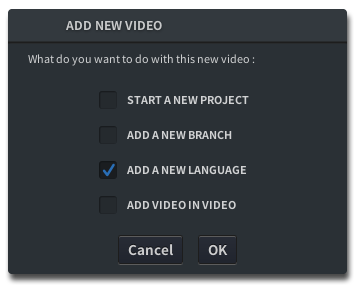
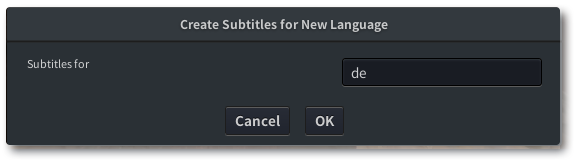
- Select ‘Add a new language’ and click ‘OK’
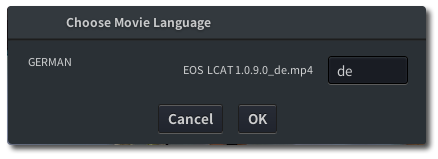
- Choose the language of your movie. In this case I choose ‘de’ for German. See our reference list of language codes. Click ‘OK’
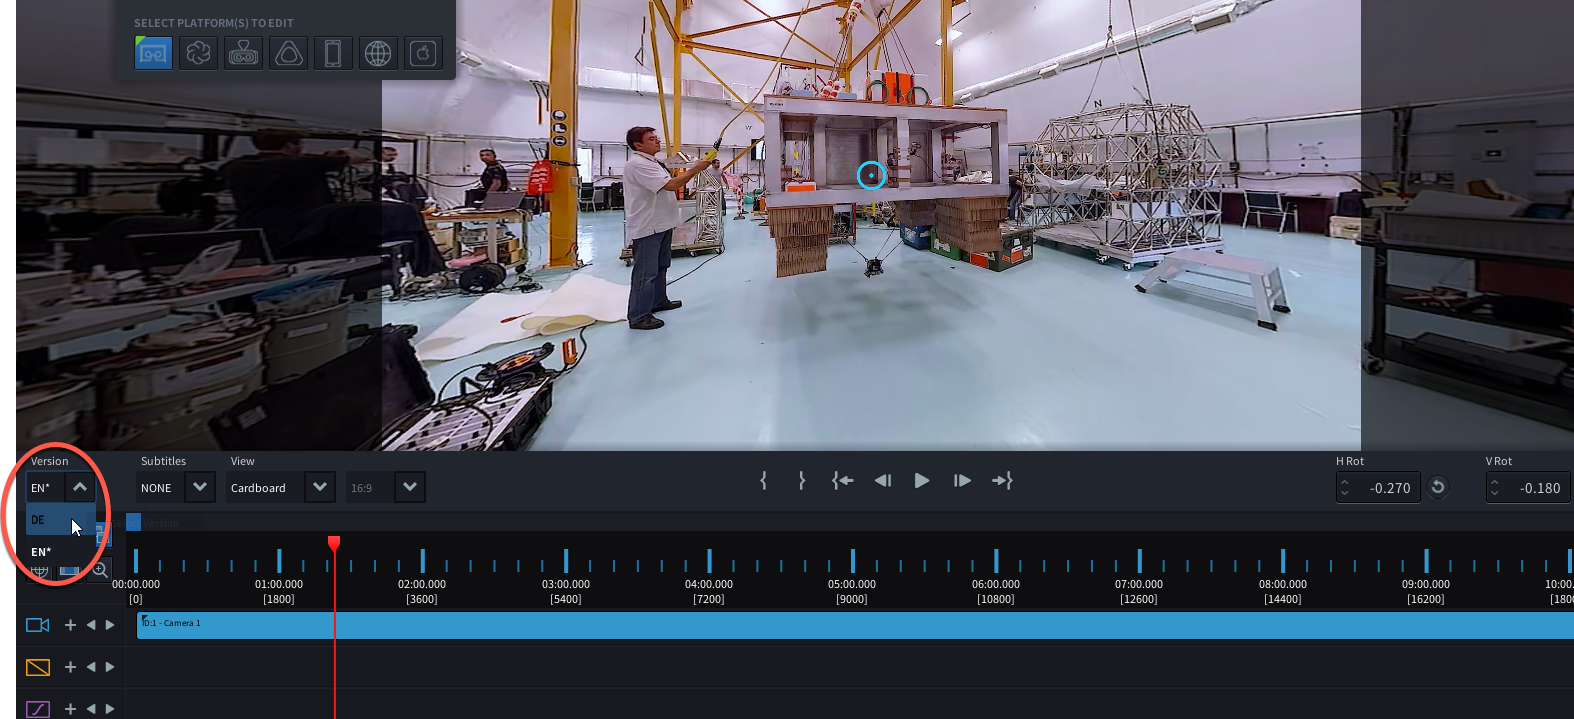
- Your film has now been versioned into another language. To play the new version in the Preview Window, click on the dropdown list under ‘Version’ on the left side of the Authoring Control Bar, and select the new language.
Prepare Assets for Multiple Languages
It is important when versioning your project for multiple languages, that you know how to prepare your assets versions (video, graphic or subtitle) so that the Authoring Tool interprets your assets correctly according to language. Once an asset has been imported and the language is assigned, you can not change its file name or designation.
Make sure that all asset versions that are part of the same asset have the same filename upon importing, or have the same file name and correct language extension. For example, my main video branch is called Main.mp4. My default language is English. I now want to import a German version of this video. I will need to name my file either: Main.mp4, or Main_de.mp4. When I import the German file Main.mp4, I indicate I want to add a new language, and then choose the language to be ‘DE’ to give it its German language designation.
The file structure that Liquid Cinema uses for its language versions is:
VideoName_Language.mp4
(example)
Main_en.mp4
Main_de.mp4
Main_fr.mp4
GraphicName_Language.png
(example)
EdgeofSpaceTitle_en.png
EdgeofSpaceTitle_de.png
EdgeofSpaceTitle_fr.png
Similarly, when adding new Subtitle versions to your project, make sure your subtitle’s name is consistent across all versions:
SubtitleName_Language.srt
(example)
EdgeofSpace_en.srt
EdgeofSpace_de.srt
EdgeofSpace_fr.srt
Creating different Subtitle Languages
Liquid Cinema can author subtitles for multiple languages within one project. The subtitle language authoring and play back is done independently from the project language authoring. For instance, it is possible to only have an English version of your project, but to have multiple subtitle languages to choose from.
To add subtitle languages to your project using SRT files:
- Simply drag the SRT file onto the Preview Window. A popup window will ask you to specify the language of the subtitle. If importing multiple language versions of the same text, make sure you are using the correct file naming and extension convention.

- Select ‘en’ for English, or any of the other language extensions that corresponds to your subtitle language (please refer to our language code reference list)
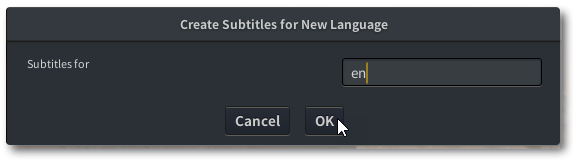
- Press ‘OK’.
- On the Playback Control Bar, use the Subtitle Dropdown menu to select which subtitle you want displayed
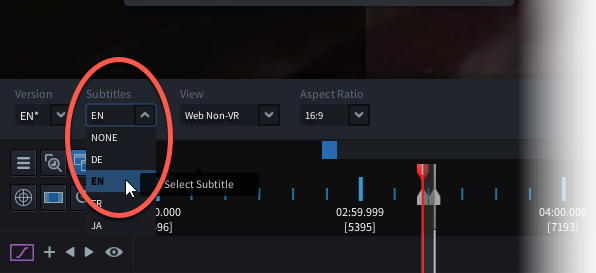
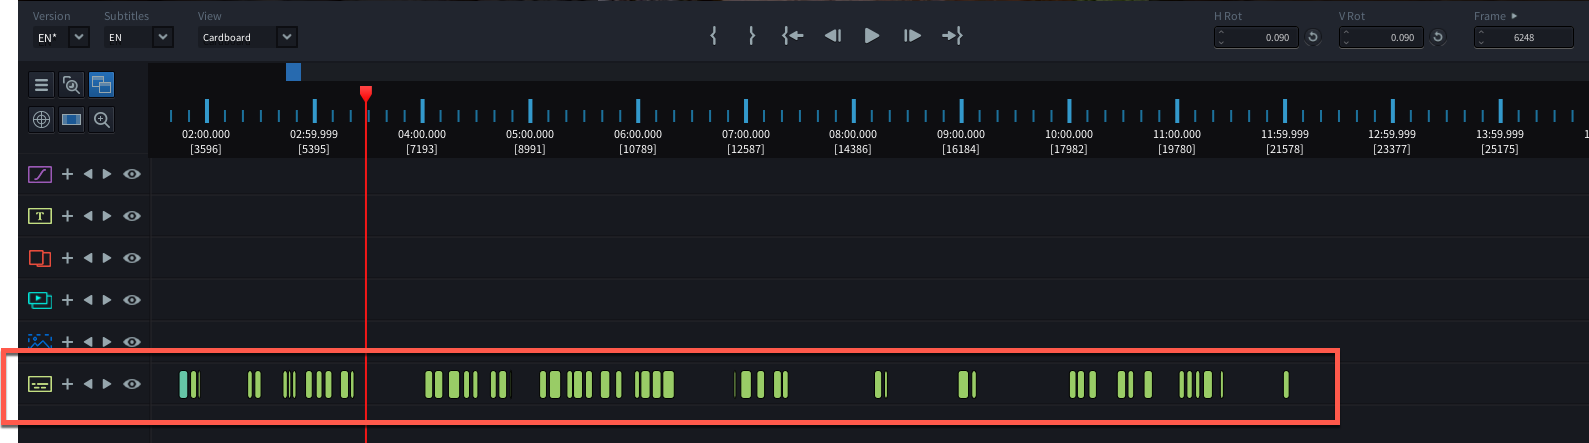
- The subtitle of your selected language will now appear on the timeline. Scroll down to reveal the Subtitle Events on the Timeline.
To add a subtitle in another language directly in the authoring tool:
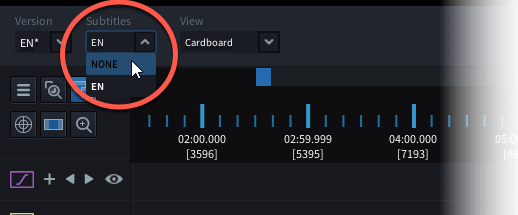
- Select ‘none’ from the Subtitle Dropdown menu on the Playback Control Bar.
- Set an In and Out point on the Timeline where you wish the subtitle to appear
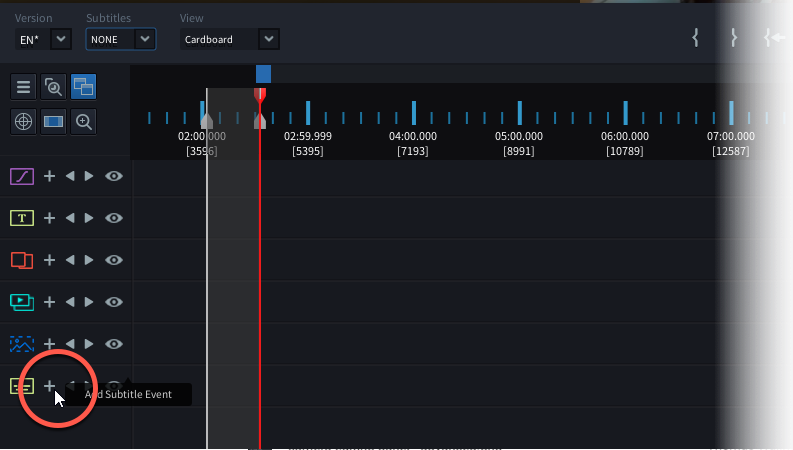
- Click the
 button next to the Subtitle Icon on the Timeline to create a new Subtitle Event
 - A popup window will as you to enter the language for your subtitle. Enter the correct language abbreviation and click ‘OK’.
- If you do not see the popup window asking you to enter the language for the subtitle, you have probably omitted ‘step 1’. Liquid Cinema does not allow you to specify a new language if you have selected a subtitle language view.
- To switch subtitle language displays, use the Subtitle Dropdown menu on the Playback Control Bar to select which language you want displayed
How to prepare SRT files for multiple subtitle languages
If importing subtitle files (SRT files) for multiple languages, it is important to use the correct naming convention and extension name. Use a consistent subtitle name, followed by the language code:
SubtitleName_Language.srt
(example)
subtitle1_en.srt (for English)
subtitle1_fr.srt (for French)
subtitle1_de.srt (for German)
Keeping the root name the same, ensures that Liquid Cinema interprets the file to be a different language version of an existing subtitle.
If you do not add the language code to your subtitle but import an SRT file with the same name, Liquid Cinema allows you to assign a language to it, and will create the extension itself.