Using Graphics
In this section, you will learn how to:
Add a Graphic to your project
In order to use graphic events, you have to first import the file image to your project.
- Drag and drop JPEG or PNG files on the PREVIEW WINDOW.
- The authoring tool will ask if you wish to copy the files into the Assets folder of your project. Click on YES.
- Choose the In-point on the TIMELINE where you want your graphic to appear
- Choose an Out-point on the TIMELINE, and click on the ‘+’ sign to add a Graphic Event
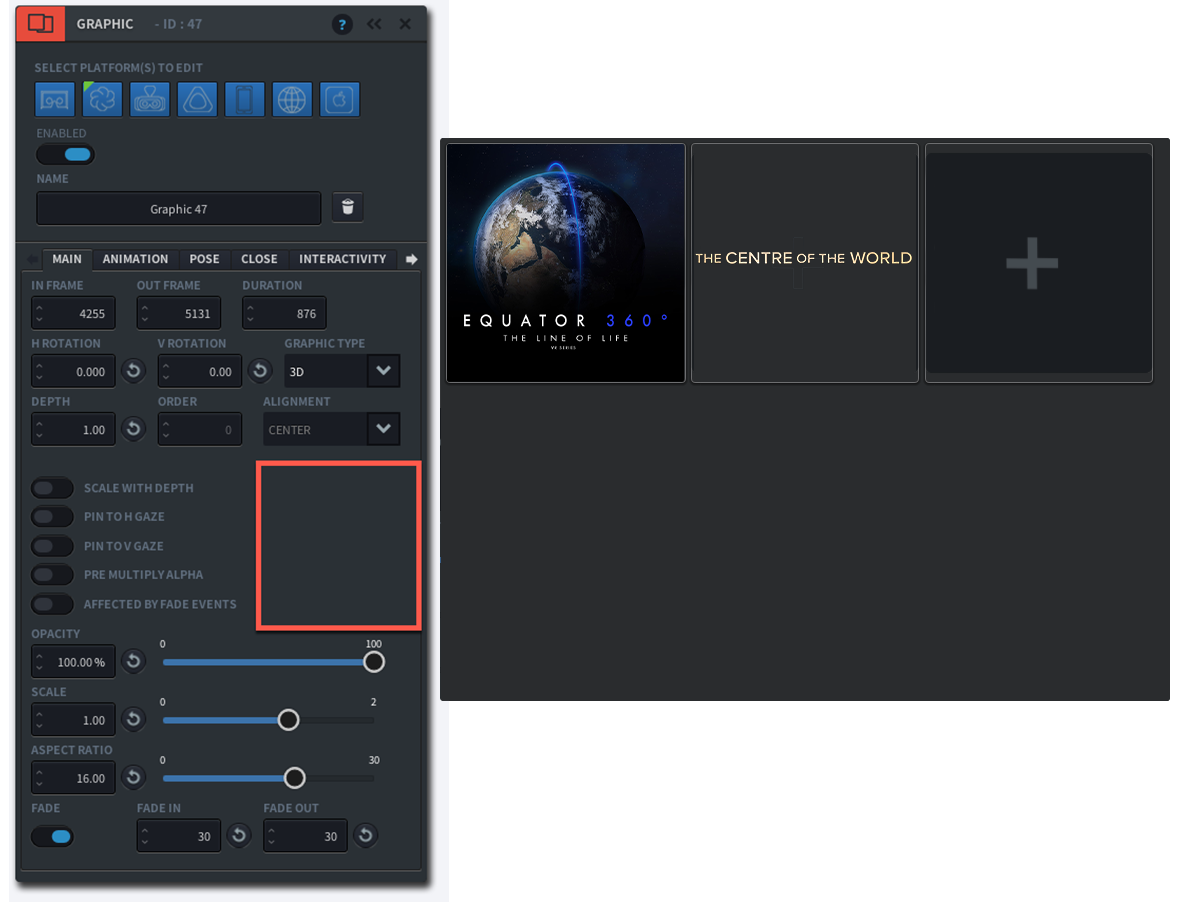
- On the GRAPHIC EDITOR, click on the thumbnail square to choose an image
- The SOURCE IMAGE WINDOW now let’s you browse all images accessible to the project. Hover over the image to see its dimensions. Click the image to select it.
- The selected image can now be seen as a thumbnail on the Main tab of the GRAPHIC EDITOR At the same time the image appears in the PREVIEW WINDOW of the Authoring Tool for further manipulation.
Position your Graphic within a 2D or 3D space
The Graphic Editor allows you to place graphics either within the the two-dimensional frame of the viewing window, or place them within a three dimensional space, as part of your 360 sphere. You can set this behaviour per platform; so within one project your graphic can behave differently depending on what platform it is being played back on.
To position a 2D Graphic:
- Open the EVENT EDITOR by creating a new Graphic or double-clicking an existing graphic event on the Timeline.
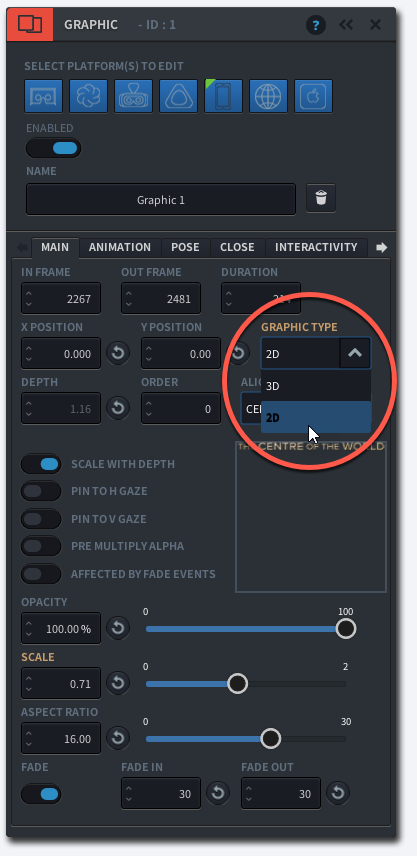
- On the Main tab, choose 2D from the GRAPHIC TYPE drop down menu
- Set the X-POSITION and Y-POSITION to adjust the placement.
- You can also change the positioning within the frame by choosing from the ALIGNMENT drop down menu
- Use the SCALE SLIDER to adjust the Scale of your graphic
- Hit the c-key to close the editing panel, or close by clicking the ‘x’
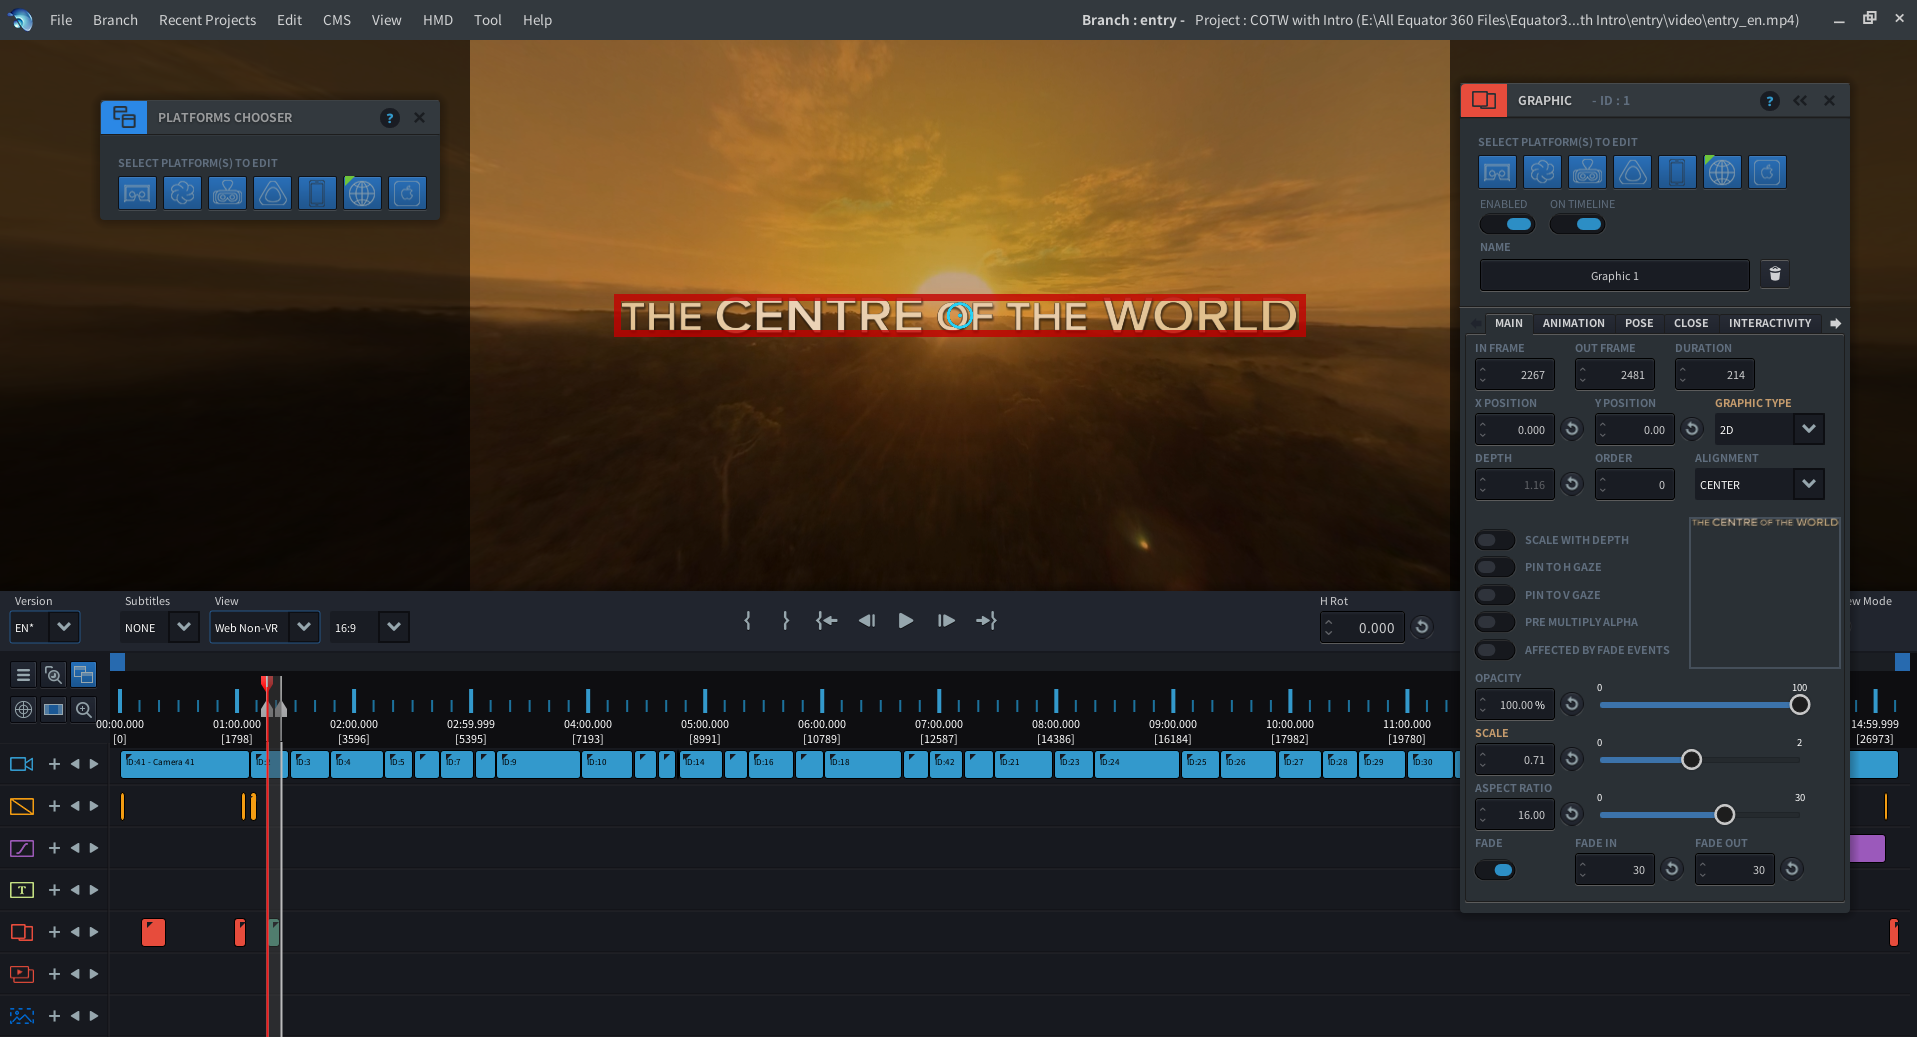
Take a look at the 2D title below. For a web browser, it is fine if it appears as a 2D image in the middle of the screen, and stays in the middle regardless of where you look.
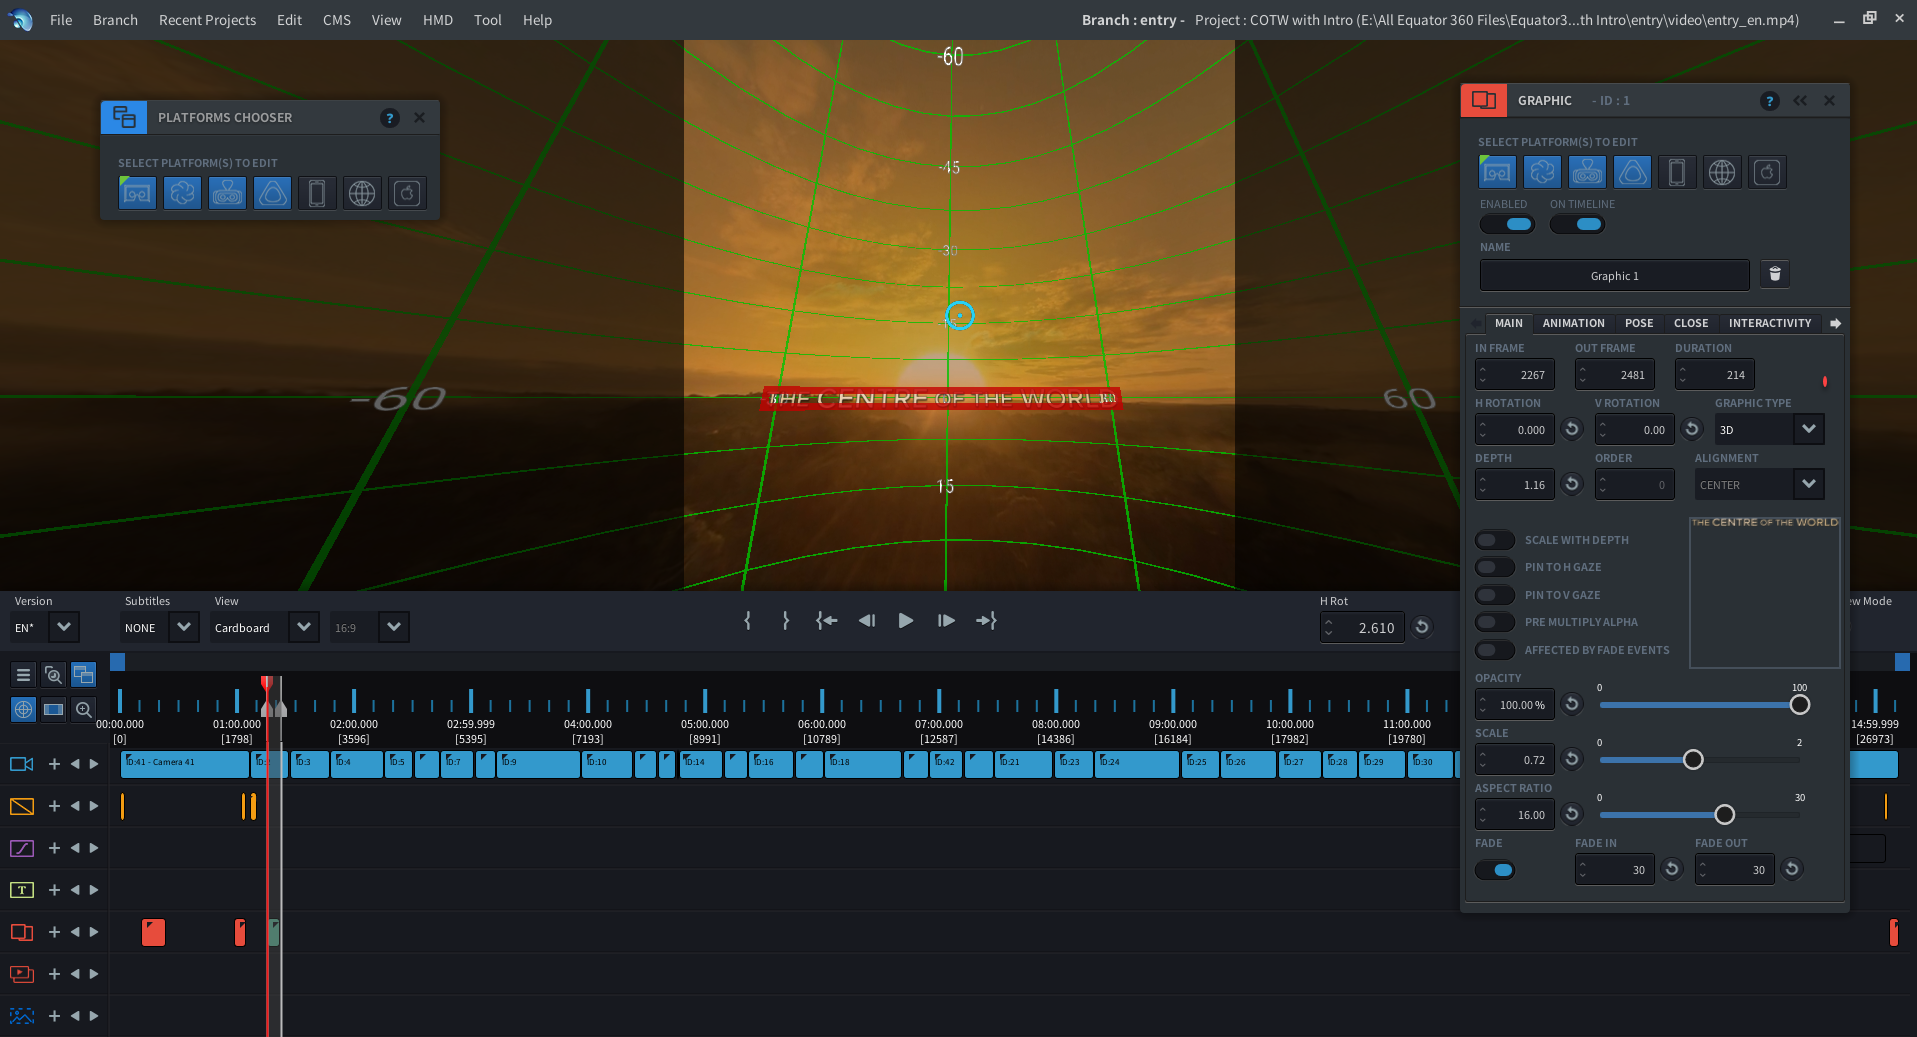
In VR however, it feels more natural if the title is ‘pinned to sphere’, meaning it moves along with the 360 sphere. Here the Graphic Type is set to 3D:
To position a 3D Graphic:
- Open the EVENT EDITOR by creating a new Graphic or double-clicking an existing graphic event on the Timeline.
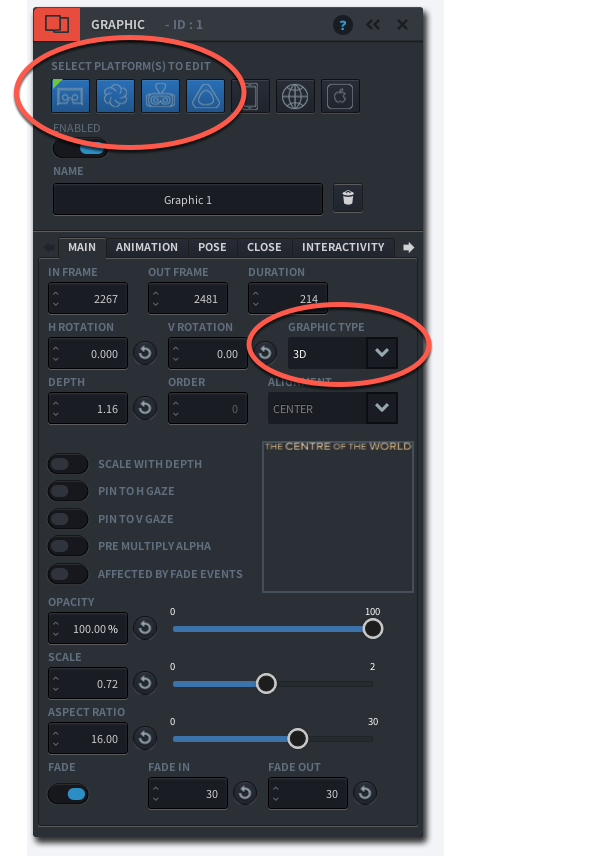
- On the PLATFORM SELECTOR, choose which platforms you want to edit. In this example, we set this title to be a 3D graphic for all VR platforms
- On the Main tab, choose 3D from the GRAPHIC TYPE drop down menu
- Set the H ROTATION and V ROTATION to place your graphic along the horizontal and vertical rotation coordinates
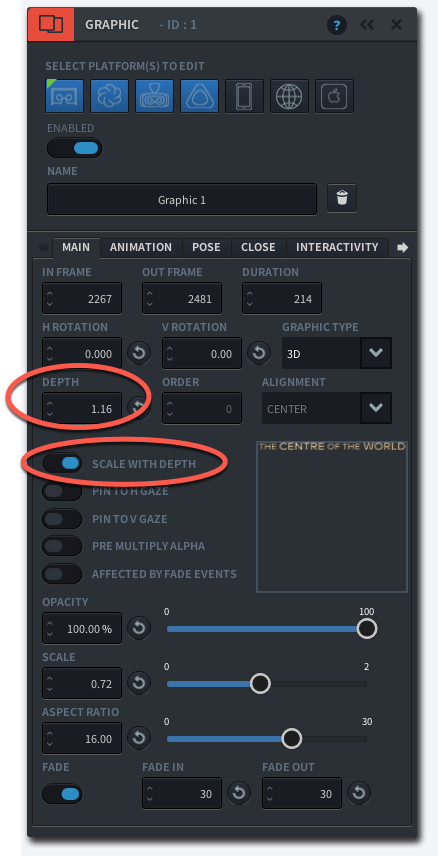
- Adjust the DEPTH positioning within the 360 space by changing the numbers in the DEPTH field. In VR, DEPTH is important for perceived distance of the graphic in relation to the viewer. Read more on DEPTH positioning below
- Use the SCALE and ASPECT RATIO slider to adjust the size of your graphic
- Hit the c-key to close the editing panel, or close by clicking the ‘x’
Adjusting the Depth
The DEPTH input field can be used to position spherical graphics in relation to one another within the physical space. Spherical graphics close to the viewer are rendered over graphics that are further away. DEPTH will influence the perceived size of the spherical graphic. As it moves further away from the viewer (higher depth value), the spherical graphic will appear smaller.
- To adjust Depth, make sure your graphic type is set to 3D
- enter the desired value in the DEPTH field. If you are authoring for VR, it’s best to have a HMD attached to your computer to see how your changes are affecting your graphic’s appearance in VR as you are adjusting these values
- if you wish to maintain the current size of your graphic, enable the SCALE WITH DEPTH slider
DEPTH in STEREOSCOPIC video
You can also use DEPTH to spatially place a spherical graphic along the Z (depth) axis in 3D space over stereoscopic 3D footage. However there are some real limitations on how well this works. Stereo 360 videos have convergence points that change from shot to shot and also within the shot as people and objects move in relation to the camera. This means that there is no specific depth at which a graphic can be placed that will work in conjunction with a stereoscopic 360 scene. In all likelihood there will be at some point a discrepancy between convergence point of the objects in the 360 scene and the graphic, making it difficult for the brain to resolve the graphic and the 360 video correctly. In some cases this can lead to double vision.
Adding a Fade to a Graphic Event
- Open the EVENT EDITOR by creating a new Graphic or double-clicking on an existing graphic event on the Timeline
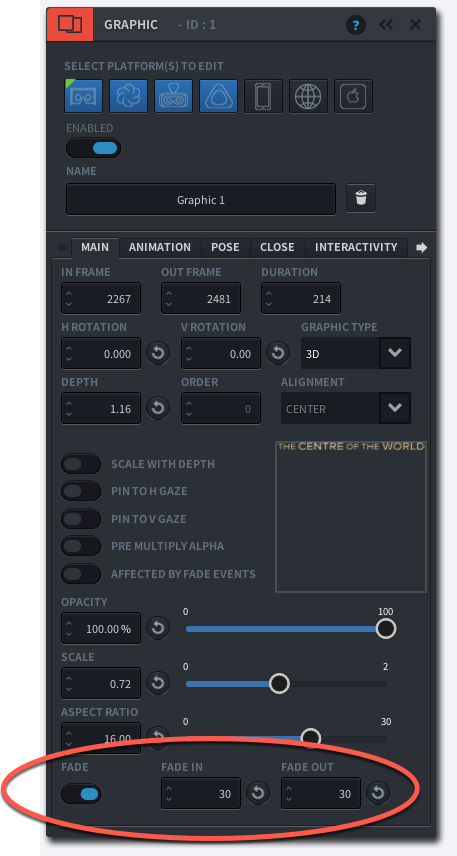
- On the Main tab, switch the Fade toggle on.
- The Fade function comes with a default 30 frame fade in and fade out. You can adjust the length of the fade by entering a different number.
- Close the panel by hitting the c-key or clicking the ‘x’ (close) button