Uploading to a CMS
The process of previewing and publishing your authored content is a two-step process. First you must upload your project to a CMS (Content Management System), then you configure the content and publish it via your CMS.
Depending on your business needs and the extend to which you wish to customize the CMS, Liquid Cinema offers two solutions:
360FLIX
- a CMS and publishing tool that is fully integrated with Liquid Cinema
- a fast, inexpensive, off-the-shelf solution
- ideal for single users, small and medium-size businesses
- free hosting of videos through Vimeo* or third party hosting provider
- 3-tier subscription model starting at FREE
*A Vimeo pro-account is required for use of 360FLIX with Vimeo
Enterprise CMS
- fully customizable CMS and hosting solution
- ideal for enterprise businesses with high volume
- dedicated server infrastructure
- technical support
- custom branded Content Management System
- request a quote today
Are you set up with Liquid Cinema’s Enterprise CMS?
Learn how to upload your Project using Liquid Cinema’s Enterprise CMS Solution
Upload your Project to 360FLIX

Before you can upload your project to the 360FLIX CMS, you will need to connect the authoring tool to the CMS using the following authorization process:
1. Go to 360FLIX to create an account or log in if you already have one.
2. Once you have created an account, you will automatically become the owner of a new Project Team. Go to Team Settings and give your team a name and thumbnail that corresponds to your authored project. Learn more about teams on 360FLIX.
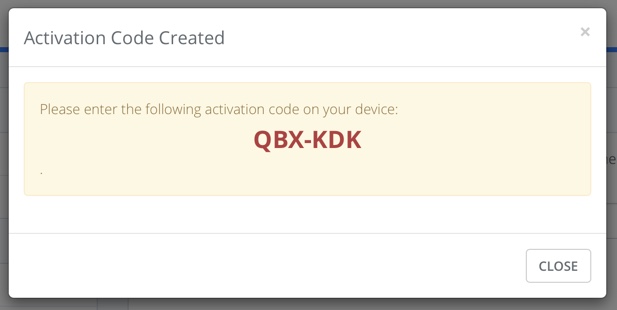
3. Generate a 6-digit Activation Code from the 360FLIX CMS. The Activation Code is unique to your project and user profile, and valid for 10 minutes only. Learn more about Activation Codes.
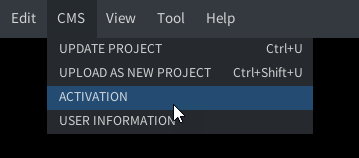
4. In the Liquid Cinema Authoring tool from the top menu, choose ‘CMS’ > ‘Activation’.
5. You will see a pop-up window with empty 6-digit field. Copy-paste the Activation Code that you just generated in Step 3 and press ‘ok’.

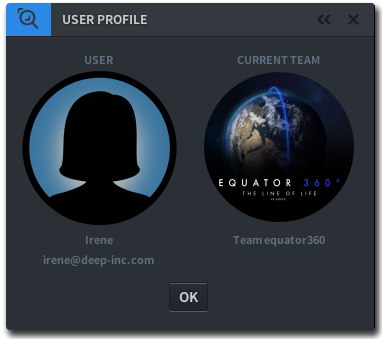
6. Once your activation is successful, your User Profile and Project Team will be displayed.
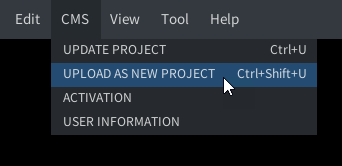
7. You are now ready to upload your project to the CMS. From the top menu, choose ‘CMS’ > ‘UPLOAD AS NEW PROJECT’
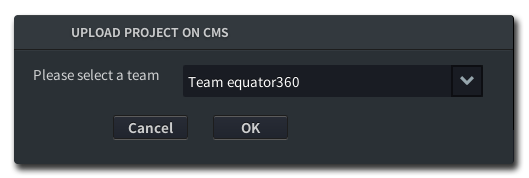
8. The following pop-up screen shows a drop-down menu. Select the Project Team that your authored project is part of and hit ‘ok’.
9. Go back to the 360FLIX CMS and look at the Projects List. (a quick way to find the project list is by clicking on the 360FLIX logo). You can verify that your upload is successful, when you see your new project is listed.

Understanding Project Teams
Every time a user subscribes to 360FLIX, they become the owner of a Project Team. One Project Team can include many videos (Projects) that are part of its deployment. For instance, if you have created a VR series about cars, you can publish all car videos (Projects) under the same Project Team, which will show up on the same app. If you wish to have multiple app deployments with each their own content, you will need to create multiple Project Teams, meaning multiple subscriptions to 360FLIX.
For more on Project Teams, visit 360FLIX.
Upload your Project to the Liquid Cinema Enterprise CMS
Liquid Cinema offers enterprise clients a fully customized CMS to cater to high volume traffic and specific needs. Once set up, you will be provided your own CMS URL.
To upload to the Liquid Cinema Enterprise CMS:
-
- In the Liquid Cinema Authoring tool from the top menu, choose ‘Tool’ > ‘Settings’.

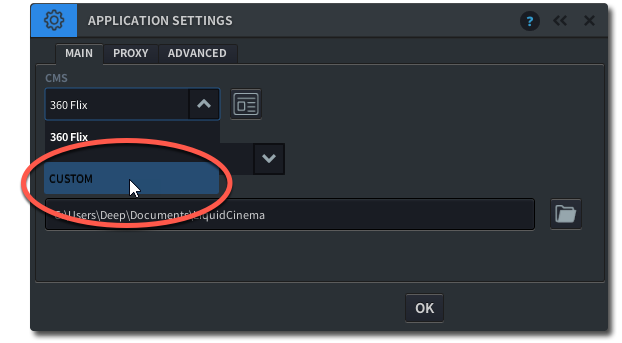
- The Application Settings Panel will open. On the Main tab under CMS, choose ‘Custom’ from the drop down menu.
- A new field will show to the right of the drop down menu. Enter the destination of your CMS’s URL.
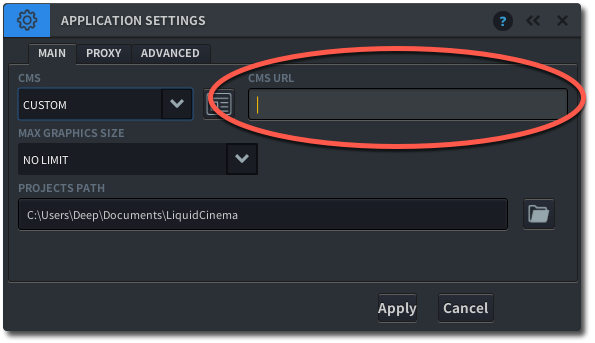
- Press ‘Apply’
- Log in to your Customized CMS to Generate a 6-digit Activation Code. The Activation Code is unique to your project and user profile, and valid for 10 minutes only. Learn more about Activation Code

- In the Liquid Cinema Authoring tool from the top menu, choose ‘Tool’ > ‘Settings’.
- In the Liquid Cinema Authoring tool from the top menu, choose ‘CMS’ > ‘Activation’.

5. You will see a pop-up window with empty 6-digit field. Copy-paste the Activation Code that you just generated in Step 5 and press ‘ok’.
6. Once your activation is successful, your User Profile and Project Team will be displayed.

7. You are now ready to upload your project to the CMS. From the top menu, choose ‘CMS’ > ‘UPLOAD AS NEW PROJECT’

8. The following pop-up screen shows a drop-down menu. Select the Project Team that your authored project is part of and hit ‘ok’.

- When logging into the Customized CMS, you will be able to see your new project listed